Log in with Google
Adding Log in with Google to your Tesseral Project gives your customers the ability to use their Google account to log into your product. Configuring Log in with Google doesn’t require any code.
Configuring Log in with Google
To configure Log in with Google, you must enable it on your Project. You will need to get a Google OAuth Client ID and Secret if you don’t have one already. If you have an existing Google OAuth client, you will need to make sure to add an authorized redirect URI to that client.
Once you have a Google OAuth Client ID and Secret, go to your Project Settings page in the Tesseral Console. Go to Google settings, and click Edit:
-
Switch Log in with Google on.
-
Under Google OAuth Client ID, input your Google OAuth Client ID.
-
Under Google OAuth Client Secret, input your Google OAuth Client Secret.
-
Click Save.
You have now enabled Log in with Google for your Project. All new Organizations will have Log in with Google enabled by default. You can now enable or disable Log in with Google on a per-Organization level.
Getting a Google OAuth Client ID and Secret
To enable Log in with Google, you must to register an “OAuth application” with Google. This is a requirement that comes from Google. This section will detail exactly how you do that, step-by-step.
Before you start, you’ll need to know your Project’s Vault Domain. You can find this under “Current Vault Domain” in your Project’s Vault Domain Settings.
Go to Google Cloud Console Credentials
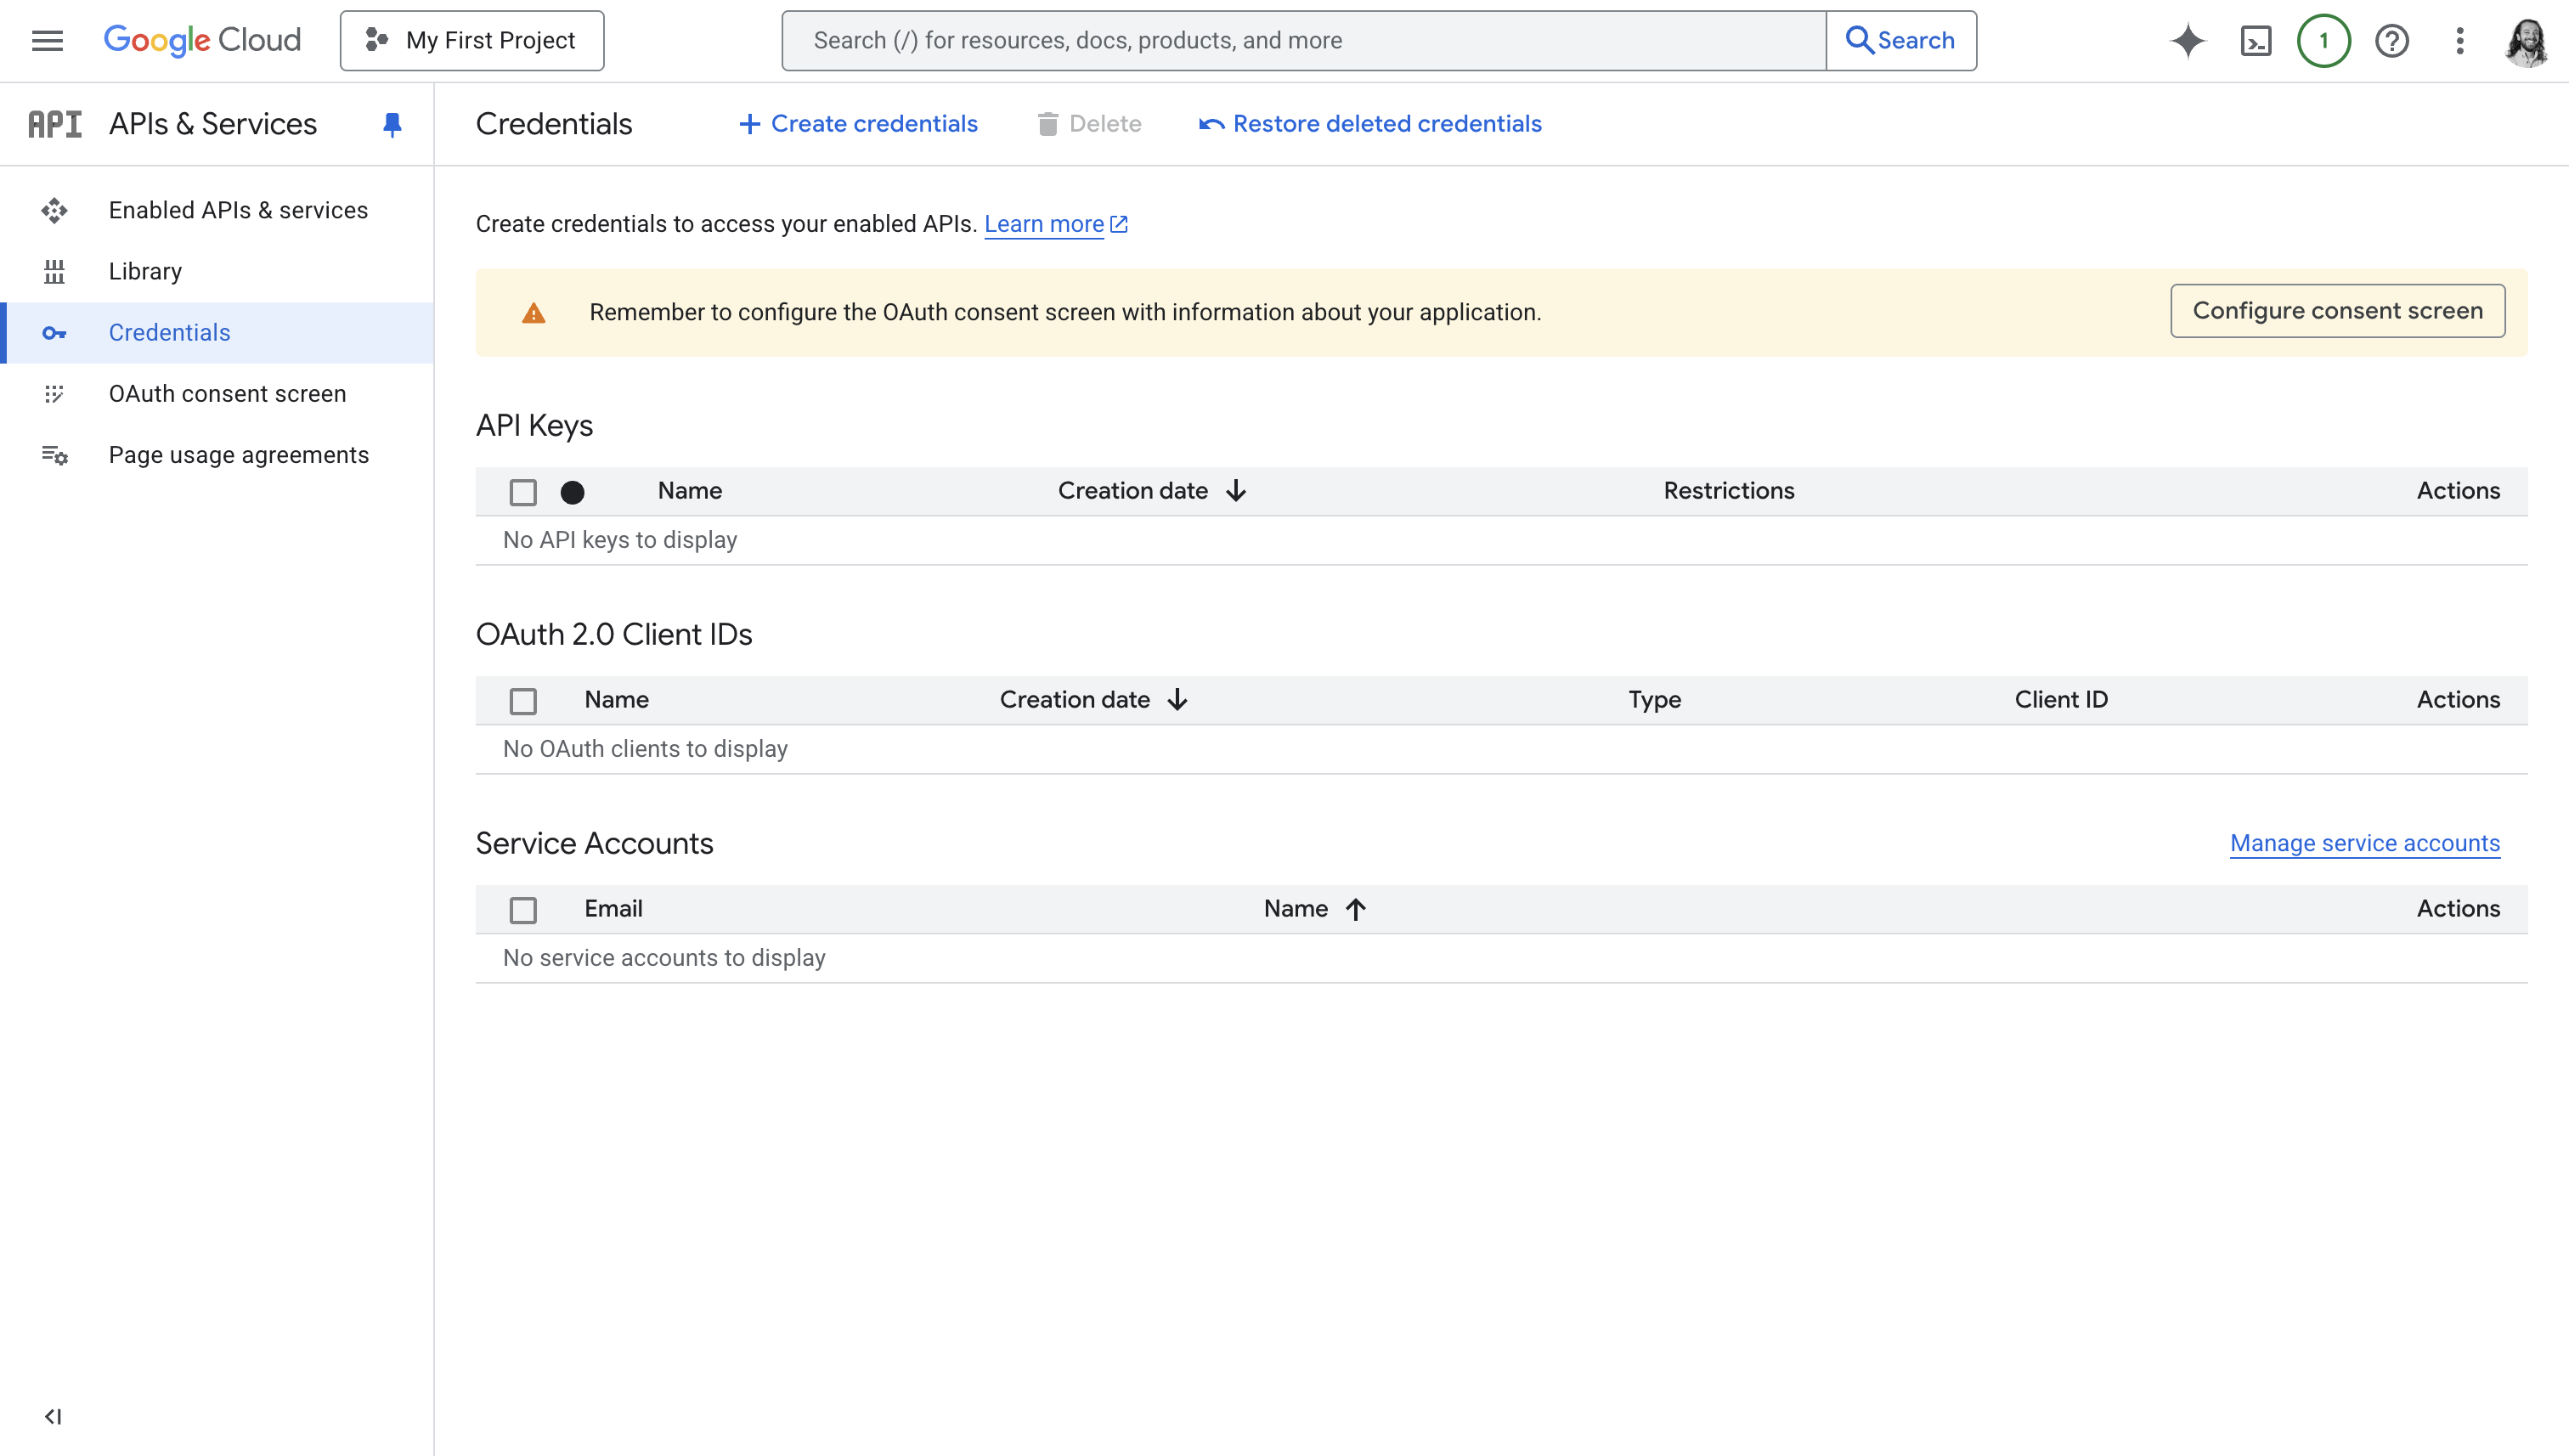
Visit the Credentials section of the Google Cloud Console.
Take note of what account you’re currently logged into in Google Cloud Console. Your current account is displayed at the top right. If you have work and personal Google accounts, make sure you’re logged in as your work account.
Google Cloud is Google’s competitor to Amazon Web Services and Microsoft Azure, but you don’t need to use any of Google’s cloud services to use Log in with Google. These instructions will guide you every step of the way.
Click on the Create Credentials button. From the dropdown, choose OAuth client ID.
Configure your OAuth Consent Screen
If Google tells you to configure your consent screen, click on the Configure Consent Screen button, or follow this link to your project’s Google Auth Platform Branding settings.
If a Get started button is present, click on it. Follow the questions Google asks. A few points to note:
-
Your App Name is public-facing. Your users will see it when they’re logging in. You should use your company’s name. Don’t include “Google” in the name.
-
When choosing your Audience, choose External.
Once you’re done, go back to Credentials again, and click on Create Credentials and OAuth client ID again.
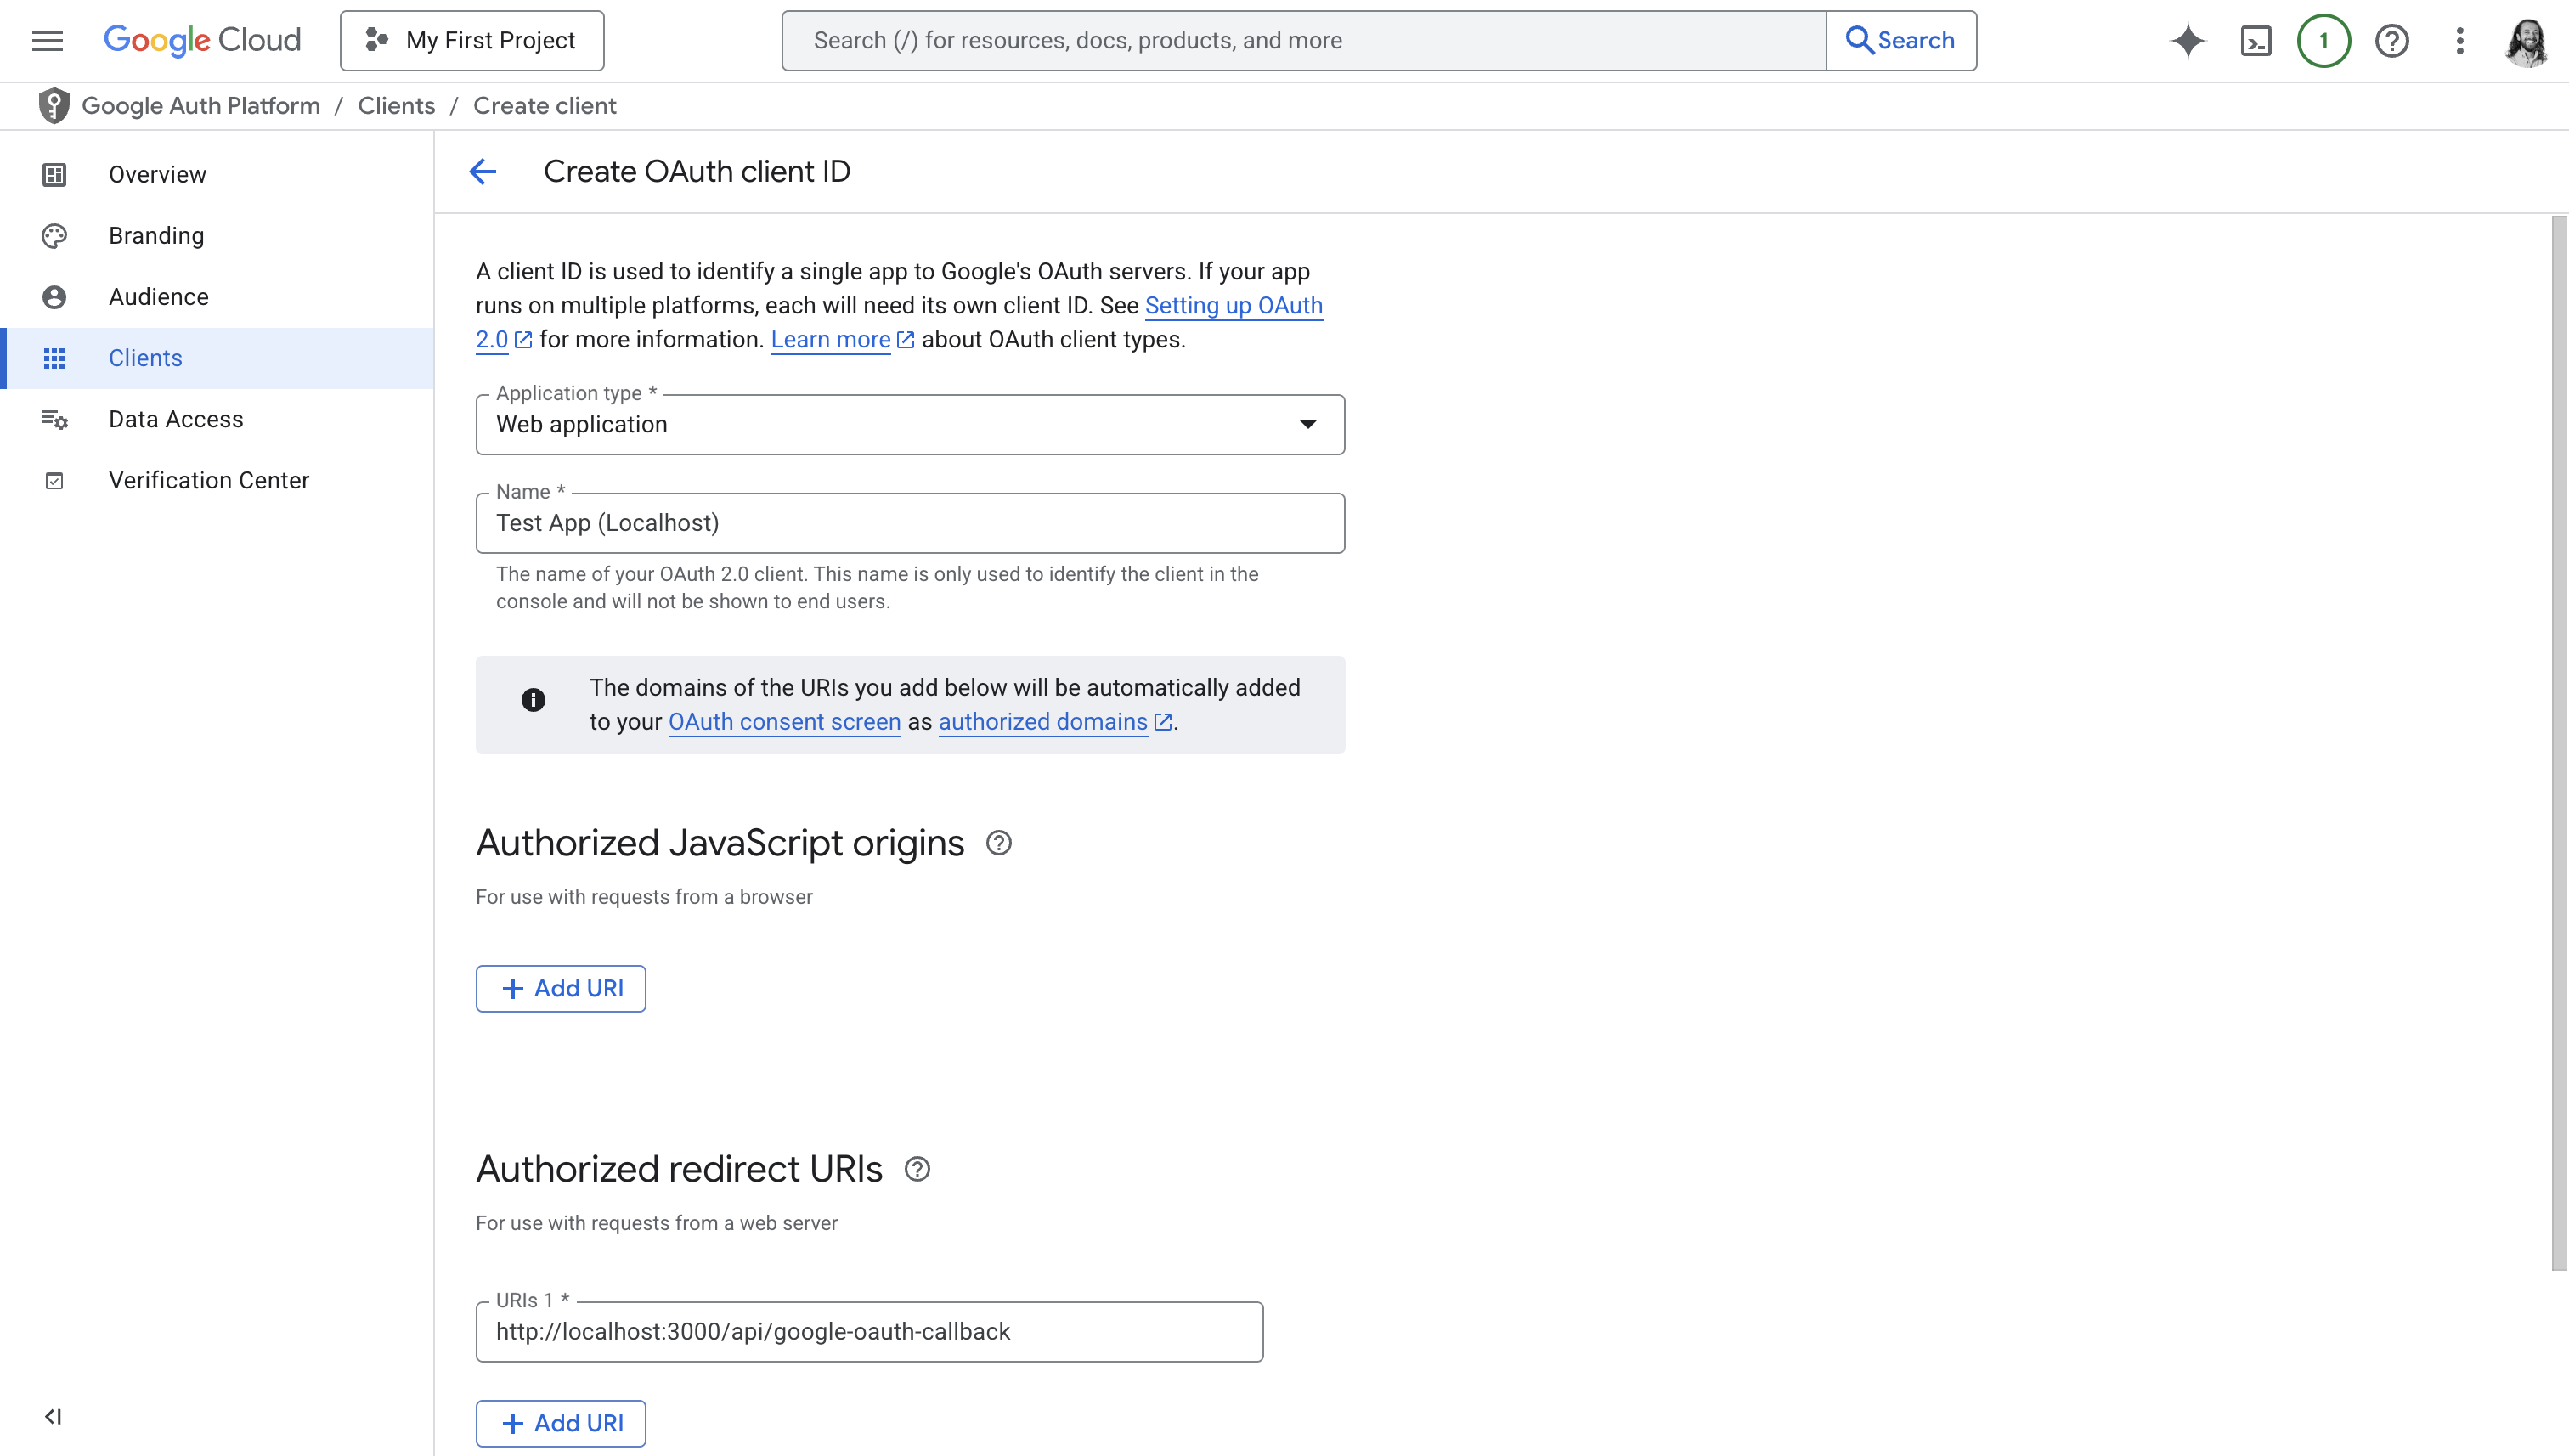
Add an Authorized Redirect URI
You can ignore Authorized JavaScript origins.
Under Authorized redirect URIs, click “Add URI” and input:
Where VAULT_DOMAIN is your Project’s Vault Domain. You can find your Project’s
Vault Domain under “Current Vault Domain” in your Project’s Vault Domain
Settings.
Click Create. Google says it may take “a few hours” to take effect; in practice creating or modifying an OAUth client is almost always instantaneous.
Copy your OAuth Client ID and secret
After clicking “Create”, Google shows you your new OAuth Client’s ID and Secret.
If you accidentally close this modal, or need to come back to it later, you can see this information again by going to the Credentials, and clicking on your client under “OAuth 2.0 Client IDs”.
Your Google OAuth Client ID typically ends in apps.googleusercontent.com. It
is public and not sensitive; you can give this value out to anyone.
Your Google OAuth Client secret typically starts in GOCSPX.
Managing Log in with Google
Once you have enabled Log in with Google on your Project, all new Organizations in your Project will support Log in with Google. Existing Organizations’ login methods are not changed automatically.
Toggling Log in with Google for an Organization
Once you have enabled Log in with Google on your Project, you can enable or
disable Log in with Google for individual Organizations in your Project from the
Tesseral Console or using the
UpdateOrganization
Backend API endpoint.
Your customer can self-serve enable or disable Log in with Google from their Self-Serve Organization Settings.
When Log in with Google is disabled for an Organization, then Users cannot log into that Organization using Log in with Google. Users will be required to use a different login method to access the Organization. Other Organizations are not affected.
Log in with Google and Enterprise Single Sign-On (SAML)
It’s common for growing companies to initially want to Log in with Google, and then switch to Enterprise Single Sign-On (SAML). That process usually looks like this:
-
Your customer has an Organization in your Project, and Log in with Google is enabled on their Organization.
-
Your customer eventually outgrows Log in with Google. Usually, this is because your customer wants better control over which employees can access your product, or because they have compliance obligations to use SAML everywhere.
-
You enable “Log in with SAML” for their Organization.
Customers cannot enable Log in with SAML entirely on their own; you must first enable it for their Organization. You may choose to only enable SAML for certain paying customers.
-
Your customer configures SAML using their Self-Serve Organization Settings. They can now log in with SAML.
-
Your customer tells their employees to expect to have to start using SAML to log into your product. During a transitional period, your customer uses both Log in with Google and Log in with SAML.
-
When your customer is ready to use Log in with SAML exclusively, they turn off Log in with Google for their Organization using their Self-Serve Organization Settings.
Once your customer disables all login methods except SAML, then SAML becomes the only way your customer’s employees can log into your product. This is the desired state for most large companies.
Every step of this process can be self-serve for your customers. You can also carry out these steps on behalf of your customer using the Tesseral Console. No step of this process requires writing any code.
Using Additional Google APIs
If you aren’t interested in reading or writing your users’ Gmail, Google Calendar, Google Drive, or other personal data hosted by Google, then you can ignore this section.
You can use Log in with Google in concert with other Google APIs. This section describes how to “upgrade” your access of Google data from the very basic information required for Log in with Google.
Registering additional scopes
Google controls which APIs you can use based on “OAuth scopes”. You can configure the scopes your application is allowed to ask for by registering these scopes to your application.
If you wish to access your user’s Google data — such as their Gmail, Calendar, or Drive — then it’s likely Google will consider your data access level to be “sensitive” or “restricted”. When you register these scopes, you will be subject to Sensitive and Restricted Scope Verification. Google will prevent you from going to production until you complete this process; expect delays of a week to months, depending on the sensitivity of the data you request.
To register scopes to your application, and to see if those scopes are subject to Sensitive or Restricted Scope Verification, see this guide.
When you enable Log in with Google on your Tesseral Project, Tesseral’s login flow will only request the least sensitive scopes. These scopes are considered non-sensitive by Google, and are never subject to Sensitive or Restricted Scope Verification.
Requesting additional scopes
Your frontend can, at any time, request scopes from your users. You can do so using “Incremental Authorization”. Incremental authorization allows you to ask for further permissions from Google users even after you may have for some permissions previously.
You should use incremental authorization to ask for additional scopes beyond the very basic, non-sensitive ones that Tesseral requests to implement Log in with Google. You can use the same OAuth client you configured in Tesseral to later request additional permissions.
Tesseral does not support requesting additional scopes as part of your Log in with Google flow, because doing so will imperil your Sensitive and Restricted Scope Verification process. In that process, Google will manually observe what your login and permissions flow looks like, and Google does not approve of applications asking for invasive permissions right from a login flow.
If you’re familiar with Google’s OAuth
flow
already, then implementing incremental authorization is as simple as including a
&include_granted_scopes=true query param to the Authorization
Endpoint.
The rest of the process is otherwise unchanged.
Using Google APIs “offline” or in the background
When you enable Log in with Google on your Tesseral Project, Tesseral’s login flow will only ask for “online” access to non-sensitive details about the user. You can upgrade that access from your own application.
Your frontend can, at any time, request additional
scopes from your user. You can also request
“offline access”, which allows you to perform background activity using
refresh_tokens.