Log in with Google
A Real-World Google OAuth flow, Step by Step
Let’s make this less abstract. Let’s see exactly how Log in with Google works from the outside, using Chess.com as an example.
Redirect to Google
I click on the “Log in with Google” button on Chess.com. Chess.com redirects me to this URL:
We’ll examine every element of this URL later, but the short answer is:
-
https://accounts.google.com/o/oauth2/v2/authis the Google Authorization Endpoint. -
response_type=codeindicates that we’re doing the “Authorization Code” flow.The only other possible value is
response_type=token, which is for the “Implicit” flow. It’s very rare to see the implicit flow used in larger applications, because it’s less secure and Google puts a bunch of limitations on the flow. -
access_type=onlineindicates that Chess.com is not doing any background activity. They could have left this parameter out, becauseonlineis the default. -
client_id=407636599248-65fjsu5h2o11er1bfjnb9ultft2246n9.apps.googleusercontent.comtells Google which application this flow is for. The value of theclient_idparameter is called an “OAuth Client ID”.407636599248-65fjsu5h2o11er1bfjnb9ultft2246n9.apps.googleusercontent.comis Chess.com’s OAuth Client ID. -
redirect_uri=https%3A%2F%2Fwww.chess.com%2Flogin%2Fgoogle%2Fredirecttells Google where Chess.com would like me to be redirected back to. In this case, it’s (after URL-decoding)https://www.chess.com/login/google/redirect. -
state=d332[...]oL2wis a parameter that Google will return back to Chess.com as part of the redirect tohttps://www.chess.com/login/google/redirect.Under the hood, Chess.com uses this to protect themselves against cross-site request forgery (CSRF) attacks.
-
scope=https%3A%2F%2Fwww.googleapis.com%2Fauth%2Fuserinfo.email%20https%3A%2F%2Fwww.googleapis.com%2Fauth%2Fuserinfo.profiletells Google what Chess.com wants to know about me. After URL-decoding and splitting on space, it’s these values:https://www.googleapis.com/auth/userinfo.emailhttps://www.googleapis.com/auth/userinfo.profile
These strings happen to be URL-shaped, but they are essentially codenames. They indicate that Chess.com wants to know my email and my personal information details (such as my name and profile picture).
-
prompt=select_accounttells Google to always ask which Google account I want to log in to Chess.com with. Otherwise, if I had logged in to Chess.com previously, Google would re-use my last account selection automatically.
Google consent
In the previous step, Chess.com redirected me to accounts.google.com in order
to kick off a “Log in with Google”. Now, it’s Google’s turn to decide what
happens next. Google has my user information, and they want to make sure I’m OK
with them giving that information out to Chess.com.
From Chess.com’s redirect, Google knows that:
- This request is a “Log in with Google” request for an OAuth Client whose ID is
407636599248-65fjsu5h2o11er1bfjnb9ultft2246n9.apps.googleusercontent.com. - That client wants to know my email and profile details.
What Google does next is it looks up the OAuth Client ID in its database, and can see that it corresponds to Chess.com. That’s how Google knows to show “Chess.com” on the consent screen.
As part of this process, Google also makes sure that the redirect_uri of
https://www.chess.com/login/google/redirect is indeed one Chess.com has
previously told Google they’d use. Google also checks that the scope requested
is OK with their sensitive scope policy.
At this point, I give Google my consent, and Google redirects back to Chess.com.
Google redirects back
Google redirects my web browser back to Chess.com with the following URL:
Never give out an OAuth code parameter to others. You must keep code secret.
The code in this example has been modified. It’s shaped like a real code
would be, but its value is fake and randomized.
The elements of this redirect are:
-
https://www.chess.com/login/google/redirectis theredirect_urithat Chess.com provided as part of its redirect to Google. -
state=d332[...]oL2wis the samestatethat Chess.com provided in that redirect. -
code=4%2F0[...]CZJqis called an Authorization Code. This value is sensitive. URL-decoded, this one is:
There are additional parameters that Google returns, but applications can always ignore them.
Exchange the Authorization Code
At this point, we can’t see what Chess.com does, because the next step happens from backend code on Chess.com’s servers. But we can infer some details, because Log in with Google works the same for every server.
Chess.com’s servers sends an HTTP POST request to
https://oauth2.googleapis.com/token with the following parameters:
-
code=4%2F0[...]CZJqis the Authorization Code from Google’s redirect back to Chess.com. -
client_id=407636599248-65fjsu5h2o11er1bfjnb9ultft2246n9.apps.googleusercontent.com, the same client ID Chess.com used to redirect to Google. -
client_secret=...is a parameter that only Chess.com knows. Chess.com got this value from Google when they registered their Google OAuth Client. -
redirect_uri=https%3A%2F%2Fwww.chess.com%2Flogin%2Fgoogle%2Fredirectis the sameredirect_uriChess.com used to redirect to Google. -
grant_type=authorization_codeindicates that we’re not doing background activity.
Google responds to this request with something like this:
Never give out an OAuth access_token parameter to others. You must keep
access_token secret.
The access_token in this example is taken from Google’s documentation, and
isn’t valid.
Chess.com’s server then takes that access_token, and makes a GET request to
a “userinfo” endpoint run by Google:
Which returns a JSON object like:
Chess.com now has my user details. They can now log me in as
ulyssecarion@gmail.com. They can update my profile picture and display name
from the picture and name fields.
In short, the steps in doing Log in with Google from Chess.com are:
-
Redirecting from Chess.com to Google. The technical term for this is a redirect to the Authorization Endpoint.
-
Google carries out a consent flow.
-
Google sends the user back to Chess.com. The technical term for the Chess.com-side redirect URL is the Redirection Endpoint.
-
Chess.com talks to Google’s Token Endpoint to acquire an access token.
-
Chess.com uses the access token to get details about the user.
-
Chess.com logs me in, and lets me resume using their application.
Each of those steps are covered in greater detail in “Elements of a Google OAuth Flow”. But to carry out these steps, we’ll first cover registering a Google OAuth Client, so that we can see the entire picture.
Elements of a Google OAuth flow
Registering a Google OAuth Client
In later steps, you’re going to need a Google OAuth Client ID and Secret. You get these from Google by creating a Google OAuth Client.
Go to Google Cloud Console Credentials
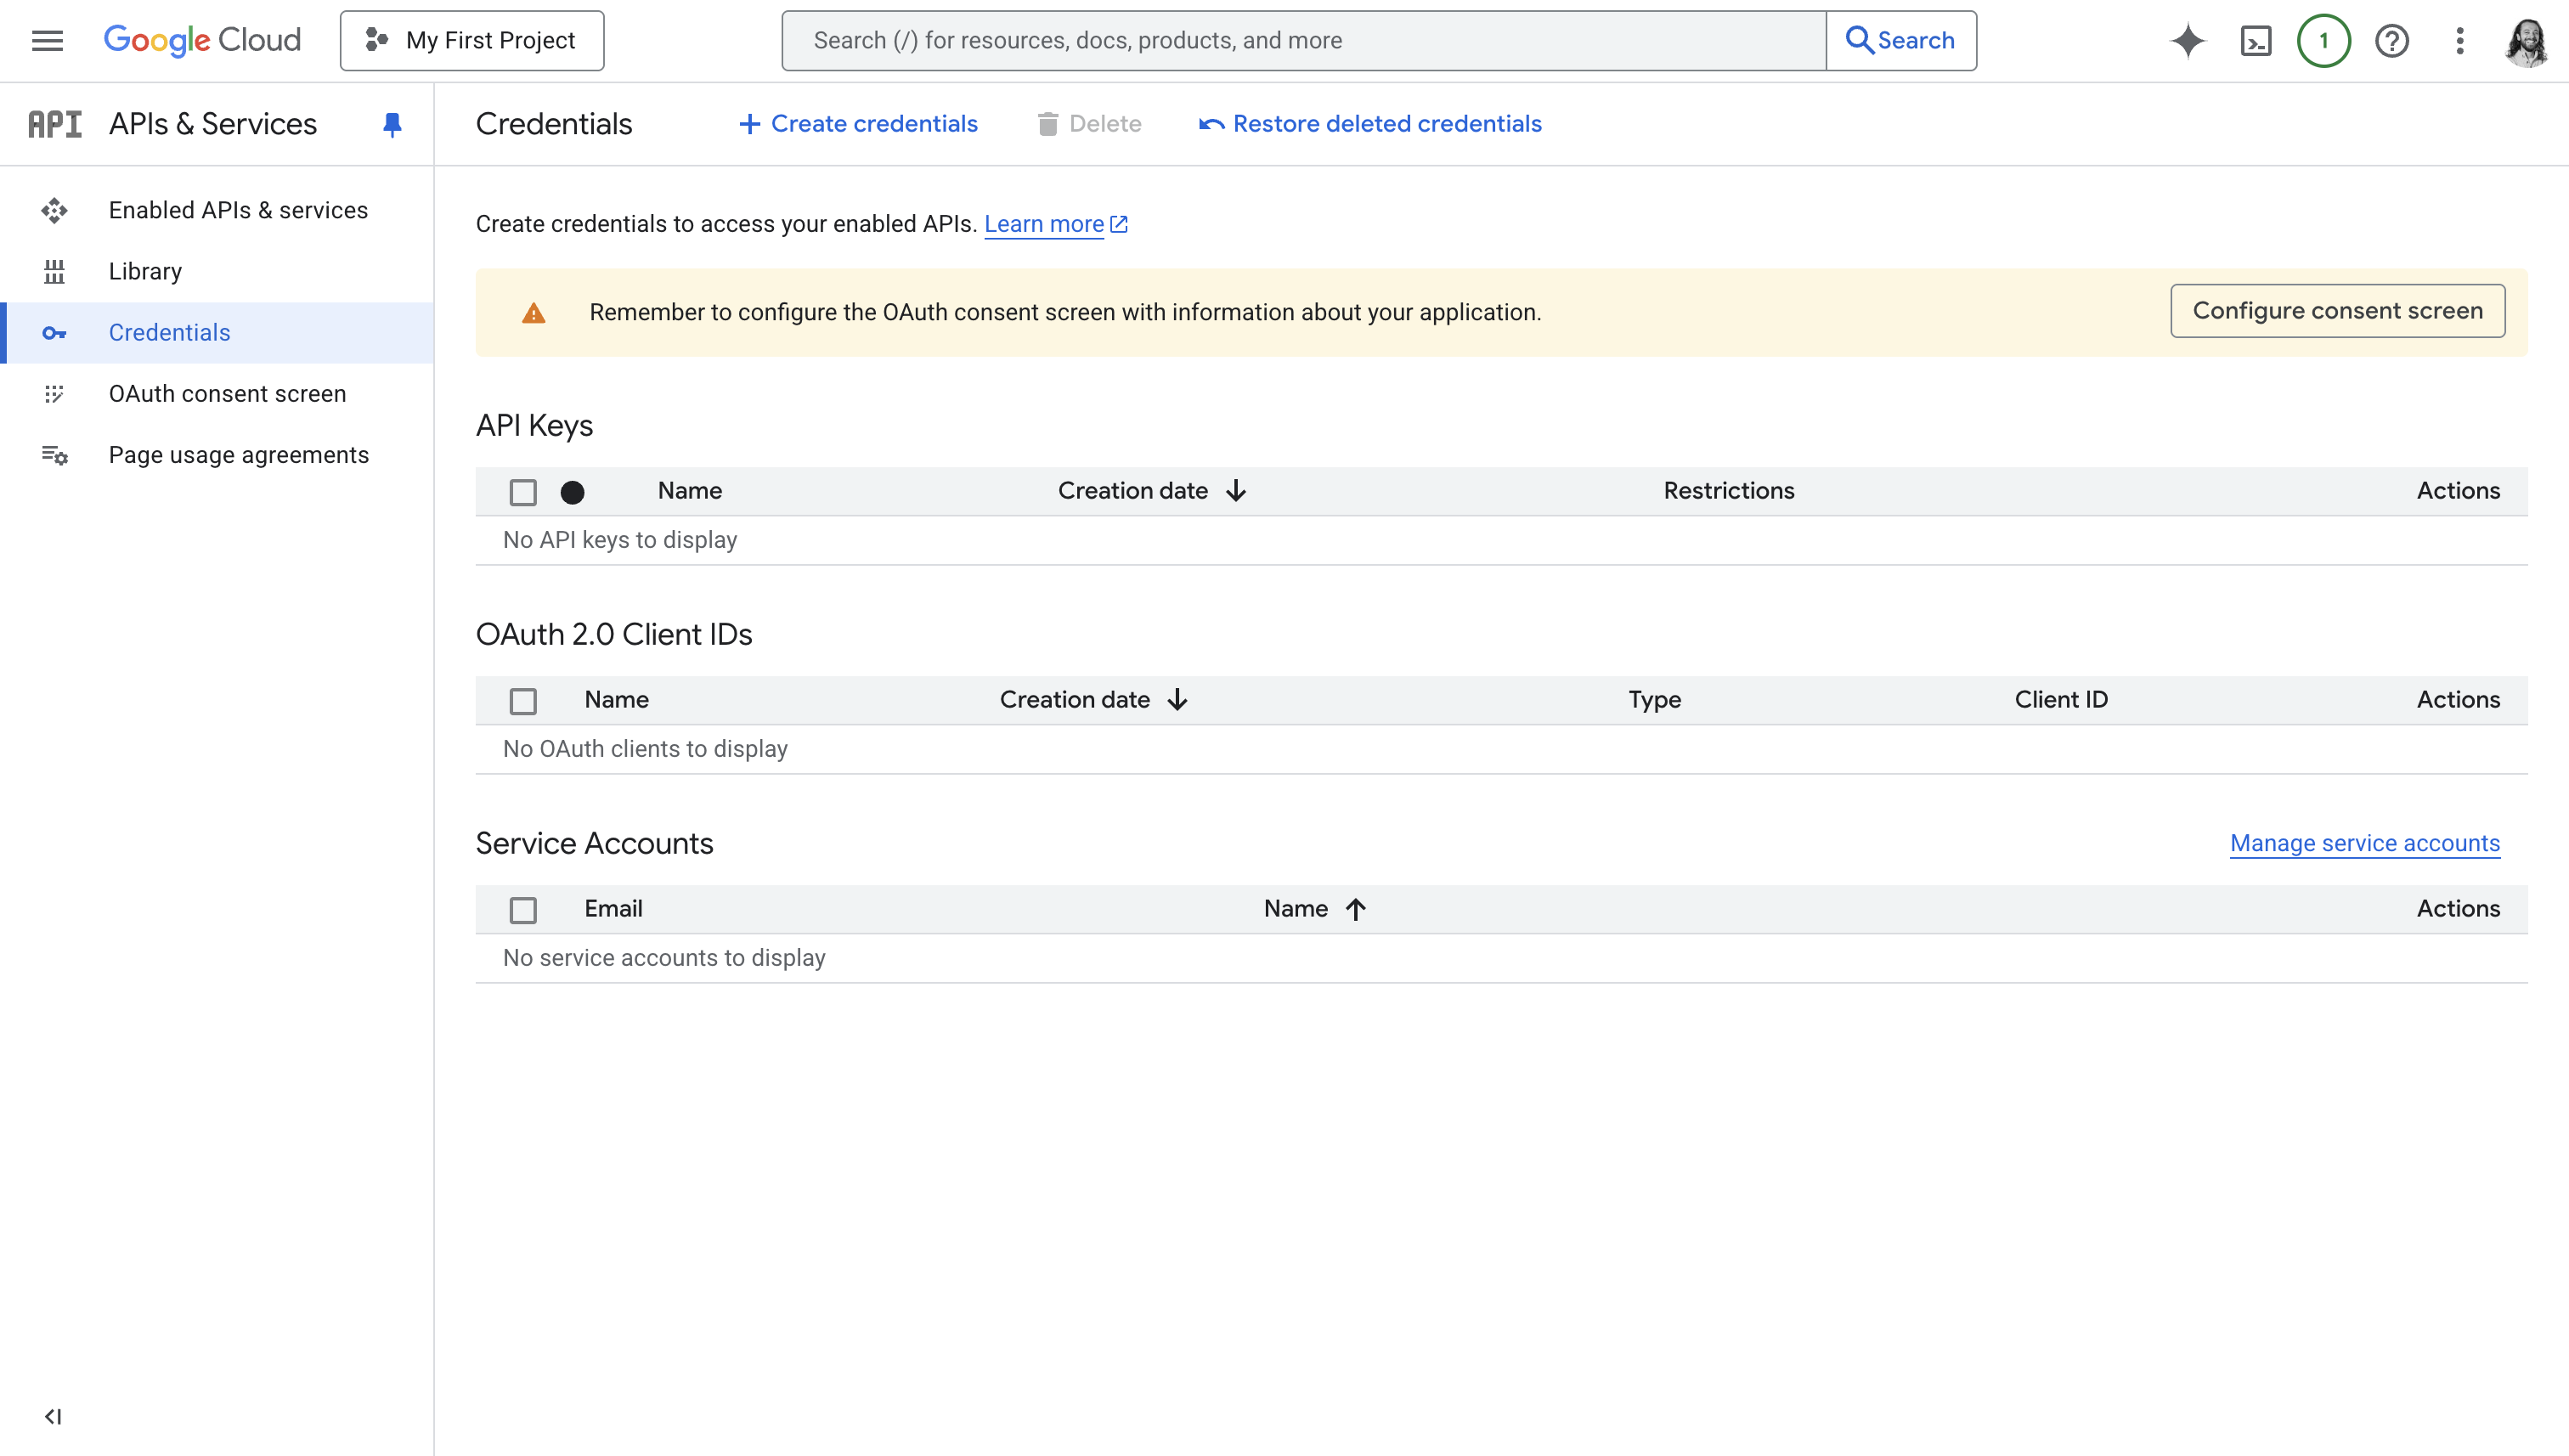
Visit the Credentials section of the Google Cloud Console.
Take note of what account you’re currently logged into in Google Cloud Console. If you have work and personal Google accounts, make sure you’re not logged into the wrong one!
Even your personal Google account can use the Google Cloud Console, and you can’t transfer your OAuth configuration between accounts.
Google Cloud is Google’s competitor to Amazon Web Services and Microsoft Azure, but you don’t need to use any of Google’s cloud services to use Log in with Google.
Click on the “Create Credentials” button. From the dropdown, choose “OAuth client ID”.
Configure your OAuth Consent Screen
If Google tells you to configure your consent screen, click on the “Configure Consent Screen” button, or follow this link to your project’s Google Auth Platform Branding settings.
If a “Get started” button is present, click on it. Follow the questions Google asks. A few points to note:
- Your App Name is public-facing. This is not an internal codename.
- When choosing your Audience, choose External.
- Make sure to provide an accurate Contact Information, especially if you may later plan to use Sensitive and Restricted scopes.
Once you’re done, go back to Credentials again, and click on “Create Credentials” and “OAuth client ID” again.
Configure your OAuth Client
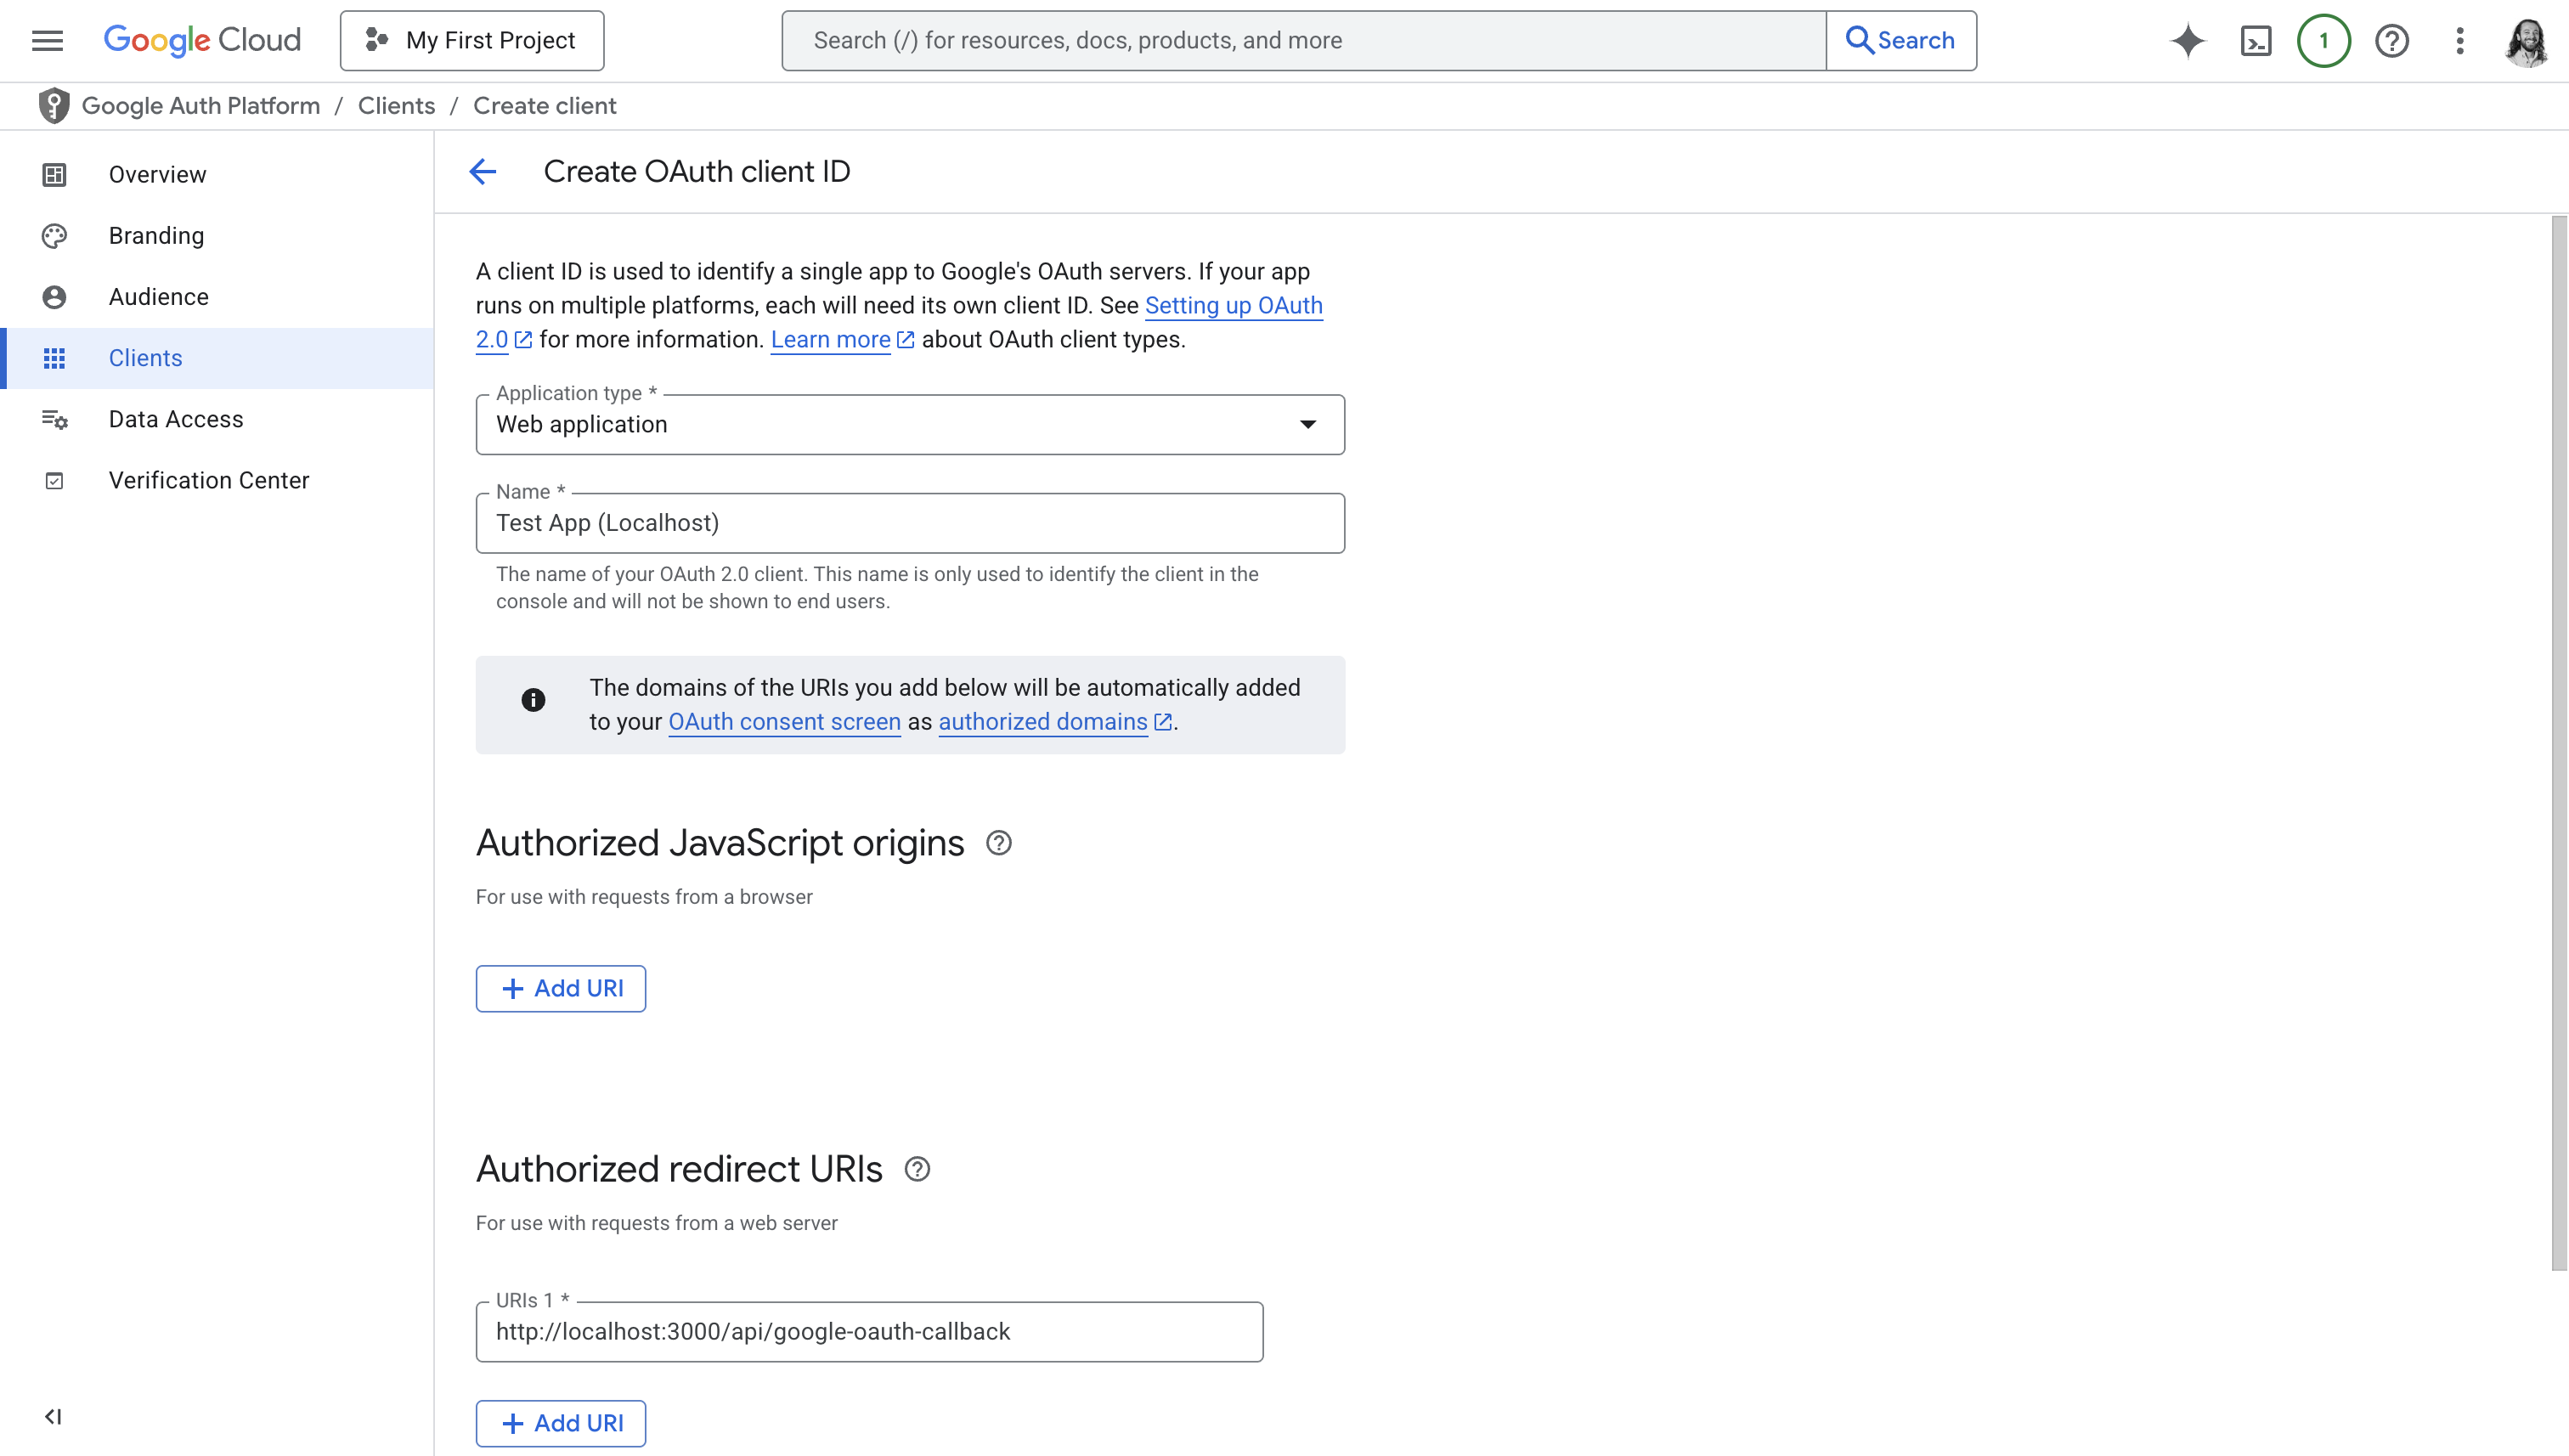
Choose “Web Application” as the “Application type”.
You can ignore Authorized JavaScript origins. Under Authorized redirect URIs, click “Add URI” and input a URL that you control that Google will redirect your users to.
You’ll be adding code to handle redirects to this endpoint in a later
section. If you’re developing your app, you can put a
localhost URL here. You can create a separate OAuth Client for production
later.
Click “Create”. Google says it may take “a few hours” to take effect; in practice it’s almost always instantaneous.
Copy your OAuth Client ID and secret
After clicking “Create”, Google shows you your new OAuth Client’s ID and Secret.
If you accidentally close this modal, or need to come back to it later, you can see this information again by going to the Credentials, and clicking on your client under “OAuth 2.0 Client IDs”.
Your Google OAuth Client ID typically ends in apps.googleusercontent.com. It
is public and not sensitive; you can give this value out to anyone.
Your Google OAuth Client secret typically starts in GOCSPX. This value is a
secret. Do not give it out. Google shows it to you in plaintext, but it is still
a secret.
Authorization Endpoint
To start your Log in with Google process, you need to redirect your users to a URL called the “Authorization Endpoint”. This is an endpoint Google hosts, and your application needs to redirect to the Authorization Endpoint when your users click on “Log in with Google”.
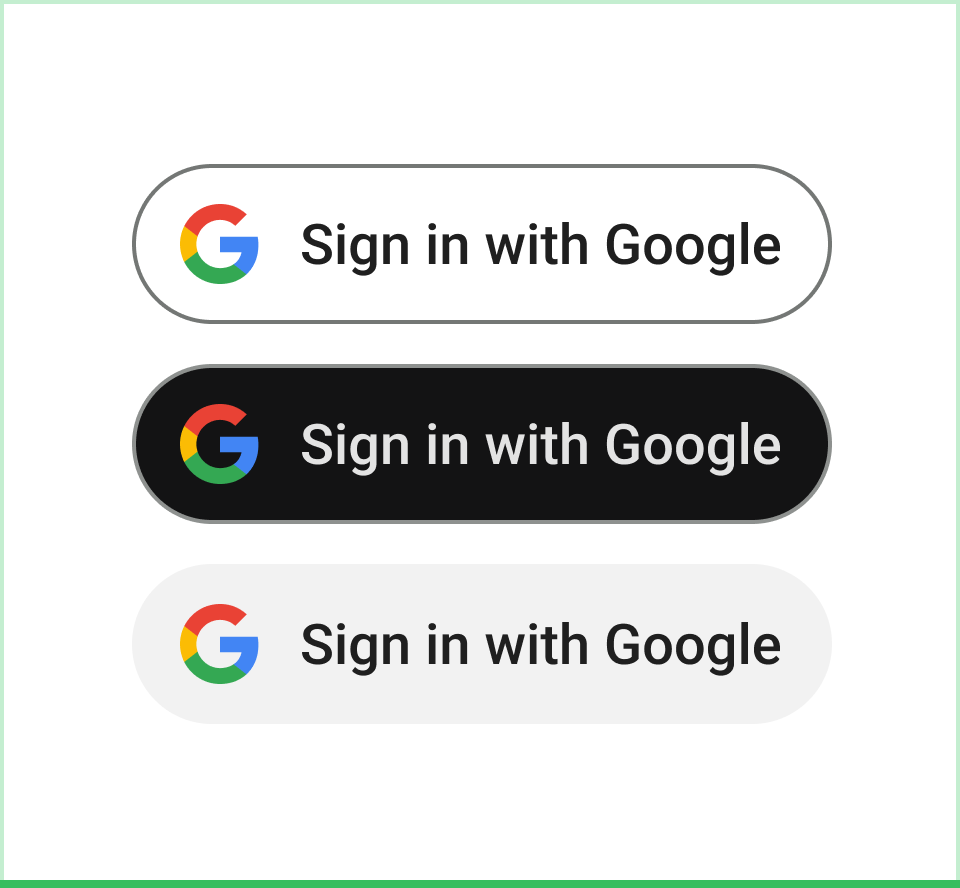
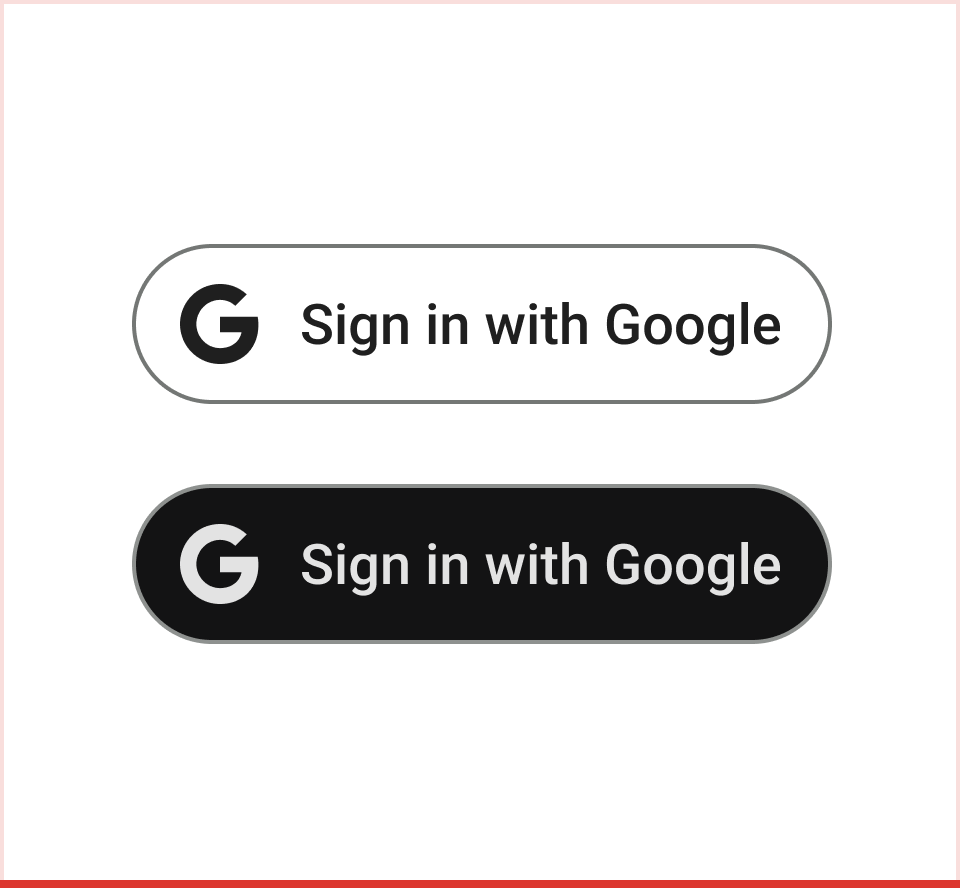
Styling the “Log in with Google” Button
Google is particular about how your “Log in with Google” button looks. If you ever need to use sensitive or restricted scopes, Google will deny you access to their APIs if this button isn’t styled correctly.
Google lays out their requirements in their branding guidelines. The most common mistake folks make is to make Google’s logo monochrome.
The state Parameter
To protect yourself from session fixation
attacks, you need to
generate a “CSRF token”, which you’ll include as the state parameter in the
next step.
A UUIDv4 is a good choice of CSRF token. You should:
- Generate a UUIDv4 client-side, using
crypto.randomUUID - Put that UUIDv4 in local storage.
google_csrf_tokenis a good choice of key name.
In other words, do this:
In the next section, you’ll redirect to a accounts.google.com URL. That URL
needs a state parameter. You’ll use this UUIDv4 as your state after you’ve
stored it to local storage.
Authorization Endpoint Parameters
When your user clicks on your “Log in with Google”, you’ll now redirect them to the Google Authorization Endpoint.
The Authorization Endpoint takes a lot of optional parameters, but a good starting point is this:
With these replacements:
-
Replace
STATEwith yourstatefrom the previous step. -
Replace
YOUR_OAUTH_CLIENT_IDwith your OAuth Client ID. -
Replace
YOUR_REDIRECT_URLwith what you configured for your OAuth Client. Make sure to URL-escape slashes into%2F.
If you have no interest in using Google APIs (beyond just supporting Log in with Google), then you don’t need any further parameters. The parameters here are:
If you do intend to use Google’s API beyond just supporting a login flow, see
“Using other Google APIs”. In particular, expect to
use a different value for the scope parameter.
Google Consent Flow
After you redirect to the Google Authorization Endpoint, Google will show your user a consent screen.
Redirection Endpoint
After your user goes through the Google consent flow, Google will redirect your
user’s web browser to the redirect_uri you provided the Authorization
Endpoint.
From your code’s perspective, users will arrive on your redirect_uri with
these query parameters in their request:
You need to authenticate that state is what you expect. Otherwise, you are
vulnerable to CSRF-based session
fixation attacks.
If this is a legitimate redirect from Google, then the state parameter you
receive here is equal to the state you saved
previously. Check that it is, by running code along the
lines of:
If the state is valid, you can proceed to the next step.
Token Endpoint
Create a new endpoint that clientside JavaScript on your Redirection Endpoint
can call. Have this new endpoint, e.g. POST /api/exchange-google-code, take a
code parameter. Have your clientside code call this new endpoint with the
code query parameter from Google.
You will now call Google’s Token Endpoint to exchange code (the “Authorization
Code”) for an access_token (an “Access Token”).
Token Endpoint Parameters
The Token
Endpoint
is an endpoint that Google hosts at https://oauth2.googleapis.com/token.
You need to call this parameter with five parameters. They are all required.
These parameters must be sent as a form body, not as JSON. The correct
Content-Type of your request is application/x-www-form-urlencoded. HTTP form
body is the same format as URL query parameters, except without the leading ?.
Most languages have built-in support for this data format.
For example, with JavaScript fetch, you would call this endpoint by using the
built-in FormData
API:
Token Endpoint Response
If Google responds with anything other than a 200, do not log the user in. The two most common problems are:
-
If you get back an object with
errorset toinvalid_client, then yourclient_id/client_secretparameters are incorrect. -
If you get back an object with
errorset toinvalid_grant, then make sure you’re not trying to redeem the samecodetwice. This happens a lot withReact.StrictModeor when manually debugging.Authorization Codes are one-time-use only. Once you redeem one, you have to hit the Authorization Endpoint again to get a new code to test with.
In the happy path, Google’s Token Endpoint will return a JSON object with a few
properties. The only one that matters for Log in with Google is access_token,
which usually has a value that starts with ya29.... The other parameters are
mostly useful only if you want to use other Google
APIs, in particular if you want to do background
activity.
Accessing Google APIs
In the previous section, you exchanged code for access_token. Now, you’ll
exchange access_token for user details.
From Google’s perspective, access_token is a general-purpose API token for
calling any Google API. But for Log in with Google, the only endpoint you need
to call is the “userinfo” endpoint.
Your backend, from the same endpoint that you used in the previous section, now
sends a GET request to https://openidconnect.googleapis.com/v1/userinfo with
the access_token from the previous section as an Authorization: Bearer
token.
For example, in JavaScript:
This returns a JSON object representing a user according to Google’s User Data Model. You now have the user’s Google ID, email, profile picture, and display name — it’s up to you to create a session for your user, and return that session data to your clientside caller.
Google’s User Data Model
Google’s user lifecycle is a frequent source of bugs for implementers of Log in
with Google. Google’s sub property is a primary ID; email is not.
Google’s userinfo endpoint returns the following
properties on a user:
When handling Google logins, you need to get or create a user based on their
Google details. The correct way to tie a Google user to your user is to store
their Google sub on your application’s user data model.
Google is very explicit that you should not use email instead of sub to do
this. Users can change their email address in Google — Google does not want
users to be locked out of your product when that happens.
If your product is B2B, you have a concept of an
organization. It’s common to automatically
put all Google users from the same Google Workspace into the same organization.
A user’s hd is a reliable way to determine that a user belongs to a Google
Workspace, as well as which Google Workspace it is.
The hd claim may change over time. When a company changes its primary domain,
the hd claim changes with it. Google does not have a good alternative to hd
that remains fixed across changes to primary domains.
To handle these cases, you must at minimum support updating organizations’
associated hd value. Be prepared to have to do so “from the backend”, as your
customers will likely be locked out of their old-hd organization. Consider
supporting a list of hd values associated with each organization, so that
customers can safely roll back to their previous hd value if they cancel their
change of primary domain.
Using other Google APIs
Log in with Google is, from Google’s perspective, the simplest possible way of using Google’s ecosystem of APIs. If you want to access your user’s Google data — such as their Calendar, Gmail, Drive, etc. — you implement a flow very similar to Log in with Google above, but with one modification:
When redirecting to the Authorization Endpoint you’ll
change the scope parameter. Instead of profile email, you’ll ask for one of
the values listed in OAuth 2.0 Scopes for Google
APIs.
When requesting these additional scopes from Google, use Incremental Authorization to avoid asking for invasive Google permissions right from the signup flow.
If you’re planning on doing background
activity, you’ll also pass an
additional &access_type=offline parameter to the Authorization Endpoint.
Incremental Authorization
If you want to access your user’s Google resources, you need to ask for the relevant OAuth scopes. Google supports “incremental authorization”, meaning you can initially request minimal permissions, and then ask for more permissions later without losing the old permissions.
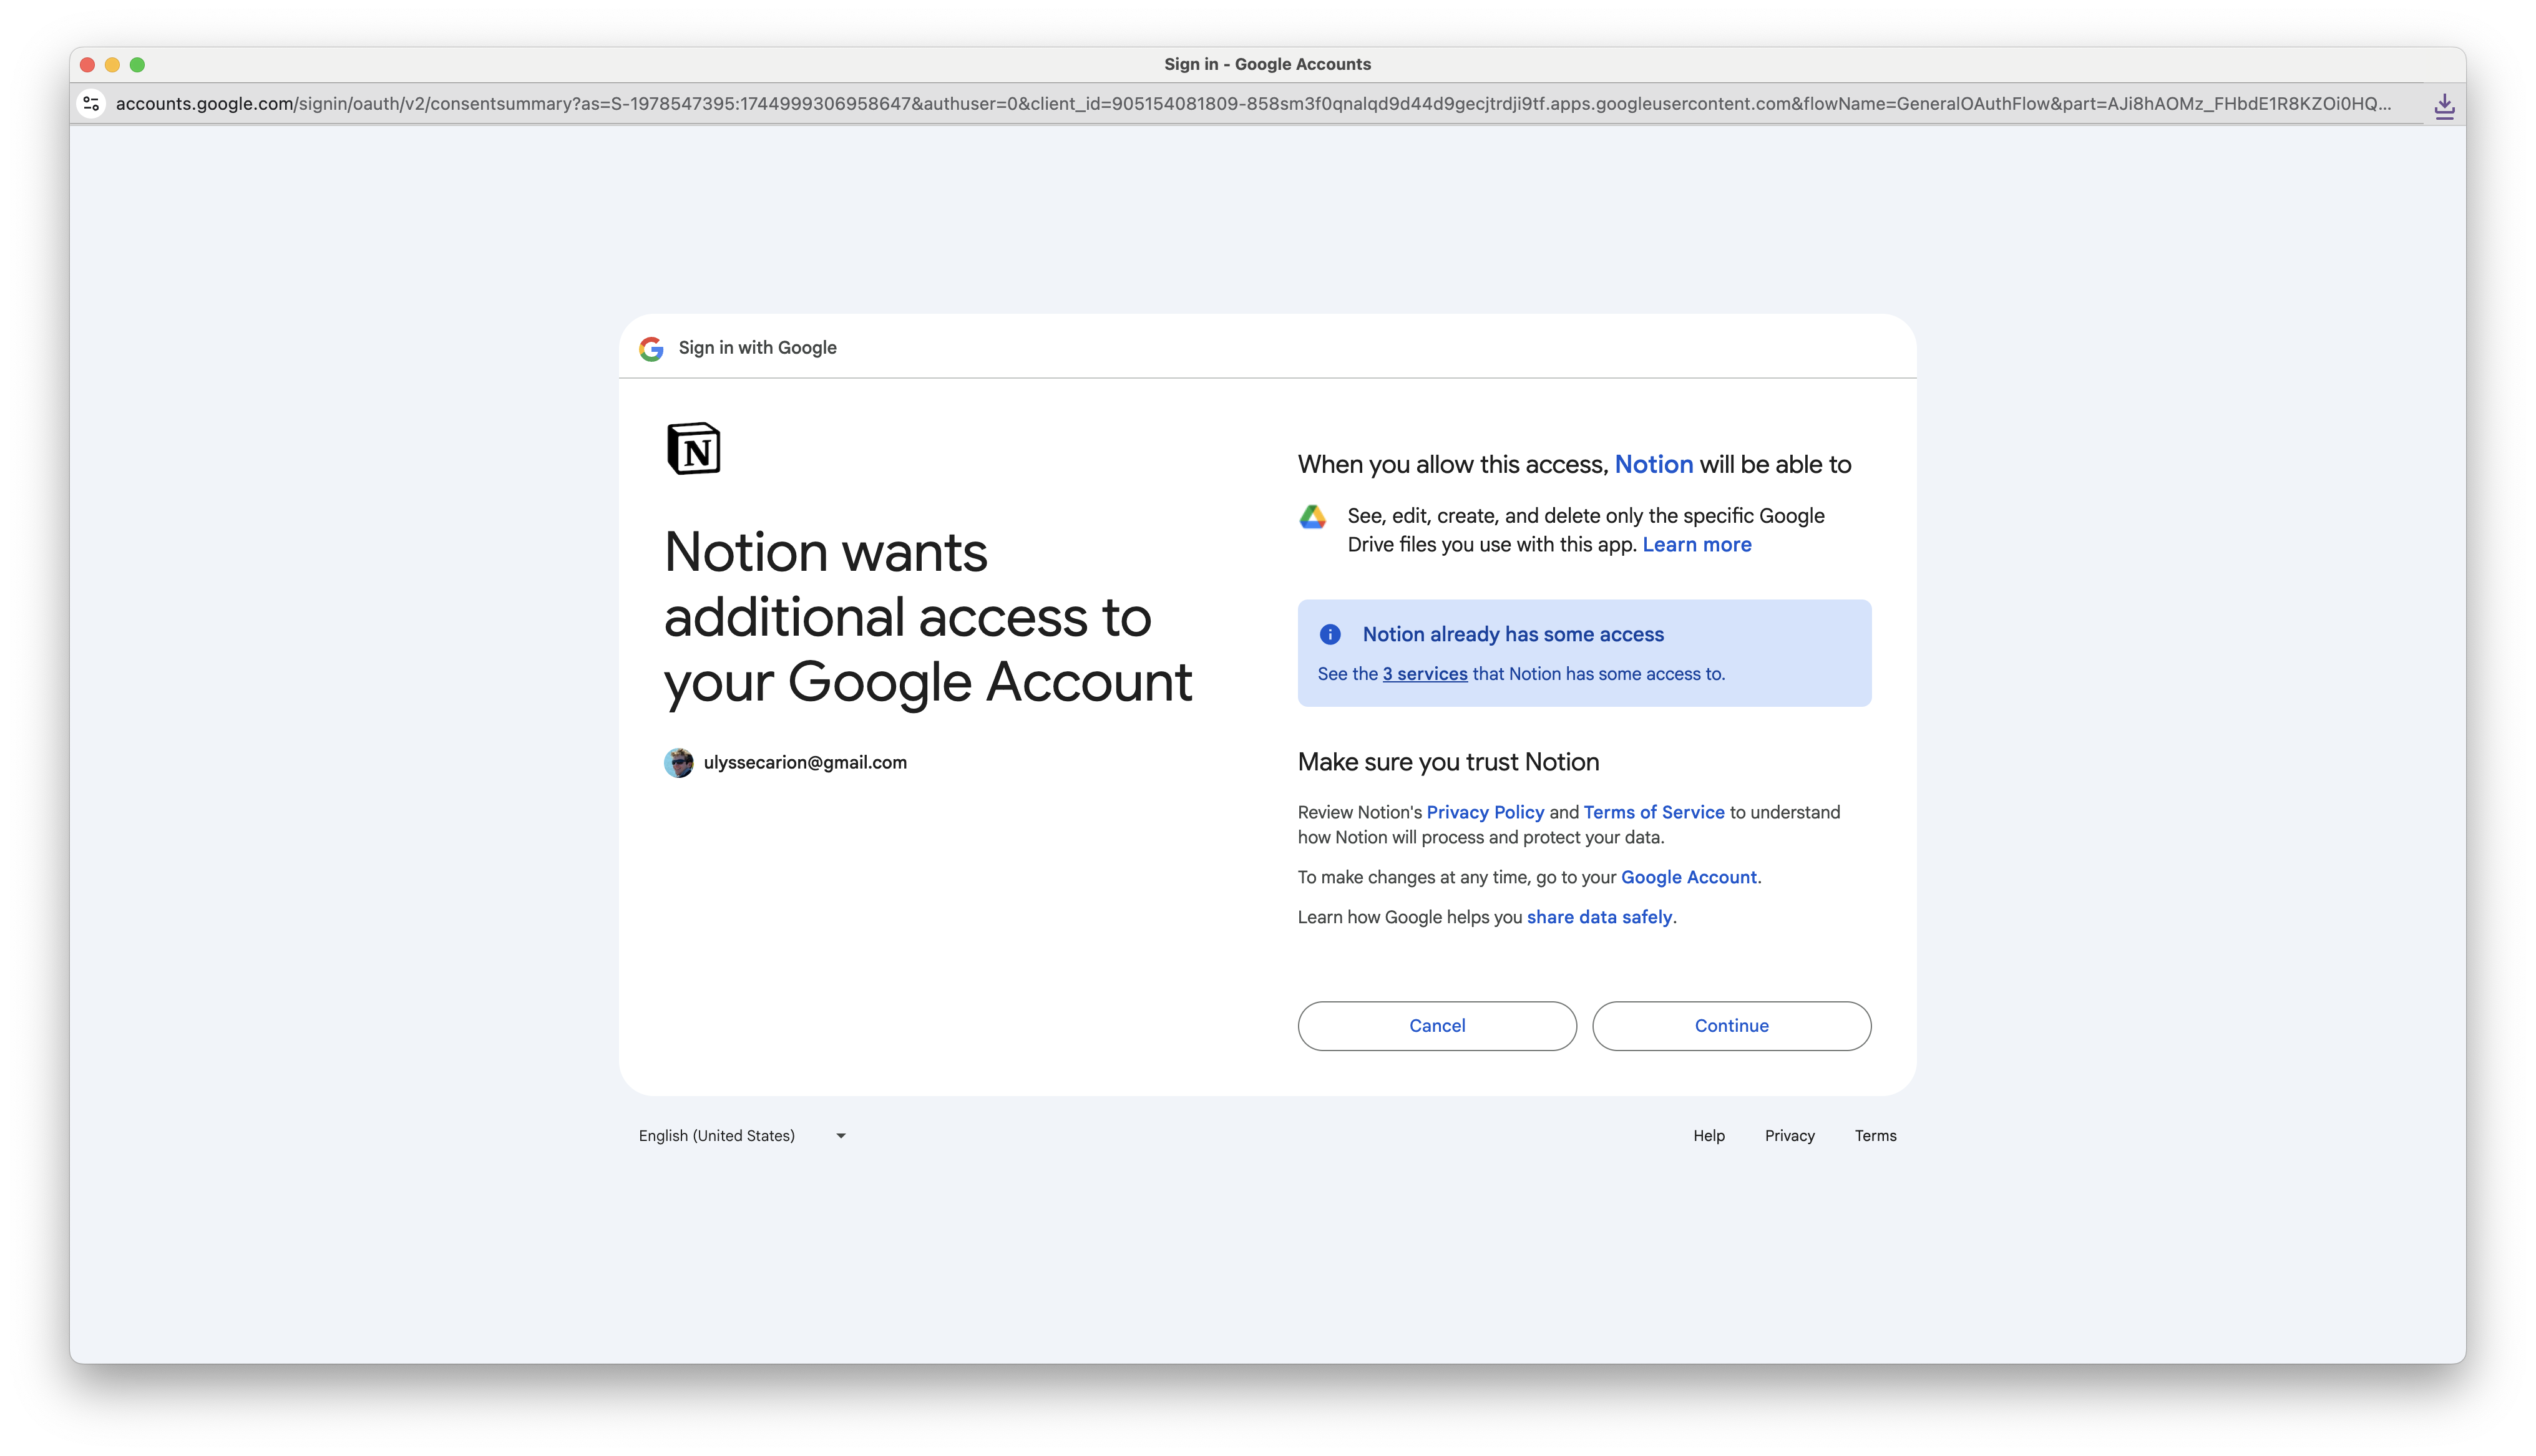
Incremental authorization in Notion. They already can access some of my data, and now they additionally want to access my Google Calendar.
For example, if your product has functionality that requires connecting to a
user’s Gmail account, that doesn’t mean you need to ask for Gmail access as part
of the “Log in with Google” flow. You can ask for the minimal openid email profile permissions on login, and then ask for the much more intrusive
https://www.googleapis.com/auth/gmail.send permission after the user clicks on
a “Configure Gmail integration” button in your product.
To use incremental authorization, go through the Google OAuth
flow as usual, with only one change: when
redirecting to the Authorization Endpoint, include
your additional permission as the &scope= parameter, and include two new query parameters:
&prompt=consent(instead of&prompt=switch_account, which is only for Log in with Google)&include_granted_scopes=true
Incremental authorization does not log your user out. You will receive a new
access_token (and refresh_token,
if you asked for one). Your user will only be asked to review the additional
permission you’re asking for.
You can use a different redirect_uri for your incremental authorization as you
do for your main “Log in with Google” flow. To do this:
-
Find your OAuth Client under the Credentials section of the Google Cloud Console. You can have multiple URLs under “Authorized redirect URIs”; add your incremental authorization redirection endpoint here.
-
In your redirect to
https://accounts.google.com/o/oauth2/v2/auth, use this new URL as yourredirect_uri.
When calling the Token Endpoint, use the same redirect_uri
you used when redirecting to the Authorization Endpoint.
Background Activity with Refresh Tokens
When you call the Token Endpoint, you get back an
access_token. This access token will only be valid for one hour. If you need
longer-lived access, you need a refresh_token.
A refresh token does not expire. You can, at any point, exchange a refresh token for a new access token. You can then use that access token to access Google APIs on behalf of your user.
Acquiring a Refresh Token
To acquire a refresh token, you should do this as part of an incremental authorization.
When redirecting to the Google Authorization
Endpoint, you’ll tell Google you want a
refresh_token by passing a &access_type=offline query parameter in the
redirect:
Then, when you call the Token Endpoint, you’ll get back a
JSON object with a new refresh_token property:
That refresh_token value is your refresh token. Refresh tokens are sensitive
secrets; never give out refresh tokens to others.
Exchanging refresh_token for a new access_token
You can’t call Google APIs using a refresh_token. Refresh tokens have only one
purpose, which is to get new (short-lived) access tokens.
You can exchange refresh_token for an access token by calling the Token
Endpoint, but with a very different set of parameters from
before. Those parameters are:
As before, these parameters most be form-encoded parameters in the HTTP body of
a POST to https://oauth2.googleapis.com/token. See the “Token Endpoint
Parameters” section of this article for more
details on how make such an HTTP request from your backend.
The response from this endpoint is roughly the same as before. In particular, it
always contains an access_token JSON property. That access token is your
“refreshed” access token, which you’ll use to call Google APIs on behalf of your
user.
Cadence of refreshing access tokens
Google doesn’t recommend any specific strategy for when you exchange refresh tokens for access tokens. However, here are a few considerations:
-
Refresh tokens and access tokens are specific to a user. Whatever your product does in background, it has to do it on a per-Google-user basis.
-
Access tokens last 5 minutes (3600 seconds). If your background activity sometimes takes longer than 5 minutes, you need to be prepared to have to refresh your access token in the middle of that activity.
-
Refresh tokens don’t expire. You are supposed to save them to your database.
-
Exchanging refresh tokens for access tokens doesn’t expire your old access tokens.
A reasonable starting point for a “refresh token strategy” would be to:
-
Make a module (class, struct, whatever’s standard in your codebase) inside your backend code that knows how to use your database to get a refresh token given a user in your product.
-
That module gives has a function that returns an access token. That function caches results for up to 5 minutes. If there’s no cached result, or the cache is older than 5 minutes old, it exchanges the refresh token for a new access token.
-
Whenever you have code that wants to do background work, it uses that module to always have an access token available. You don’t need to worry about having multiple instances of this module in flight at once.
If you’re not sure where to begin, this approach is a reasonable starting point. If it turns out this approach doesn’t meet your requirements, you can adapt your solution.
Sensitive and Restricted Scope Verification
Google’s Sensitive and Restricted Scope Verification process is a common source of delay for new products that interact with Gmail, Google Calendar, Google Drive, and other Google services.
Restricted Scope Verification takes at least a month, sometimes multiple months.
Sensitive Scope Verification takes about a week.
Google categorizes all of its OAuth scopes into three buckets:
-
Non-sensitive scopes are the least risky APIs. Basic scopes like
openid,email, orprofileare non-sensitive scopes.If “Log in with Google” is the only reason you use Google OAuth, then all the scopes you need are non-sensitive, and you do not need worry about Google’s verification process.
-
Sensitive scopes are APIs that Google considers risky. Read-only access to Google Calendar is a sensitive scope.
-
Restricted scopes are the APIs that Google considers the most risky. Read access to Gmail is a restricted scope.
Determining if a scope is sensitive or restricted
Go to the Data Access section of Google Auth Platform. This is where you can declare to Google the set of OAuth scopes you intend to request access to.
Click on the “Add or remove scopes” button in the Data Access settings. From the sidebar, use the search input to find the scope you’d like to access.
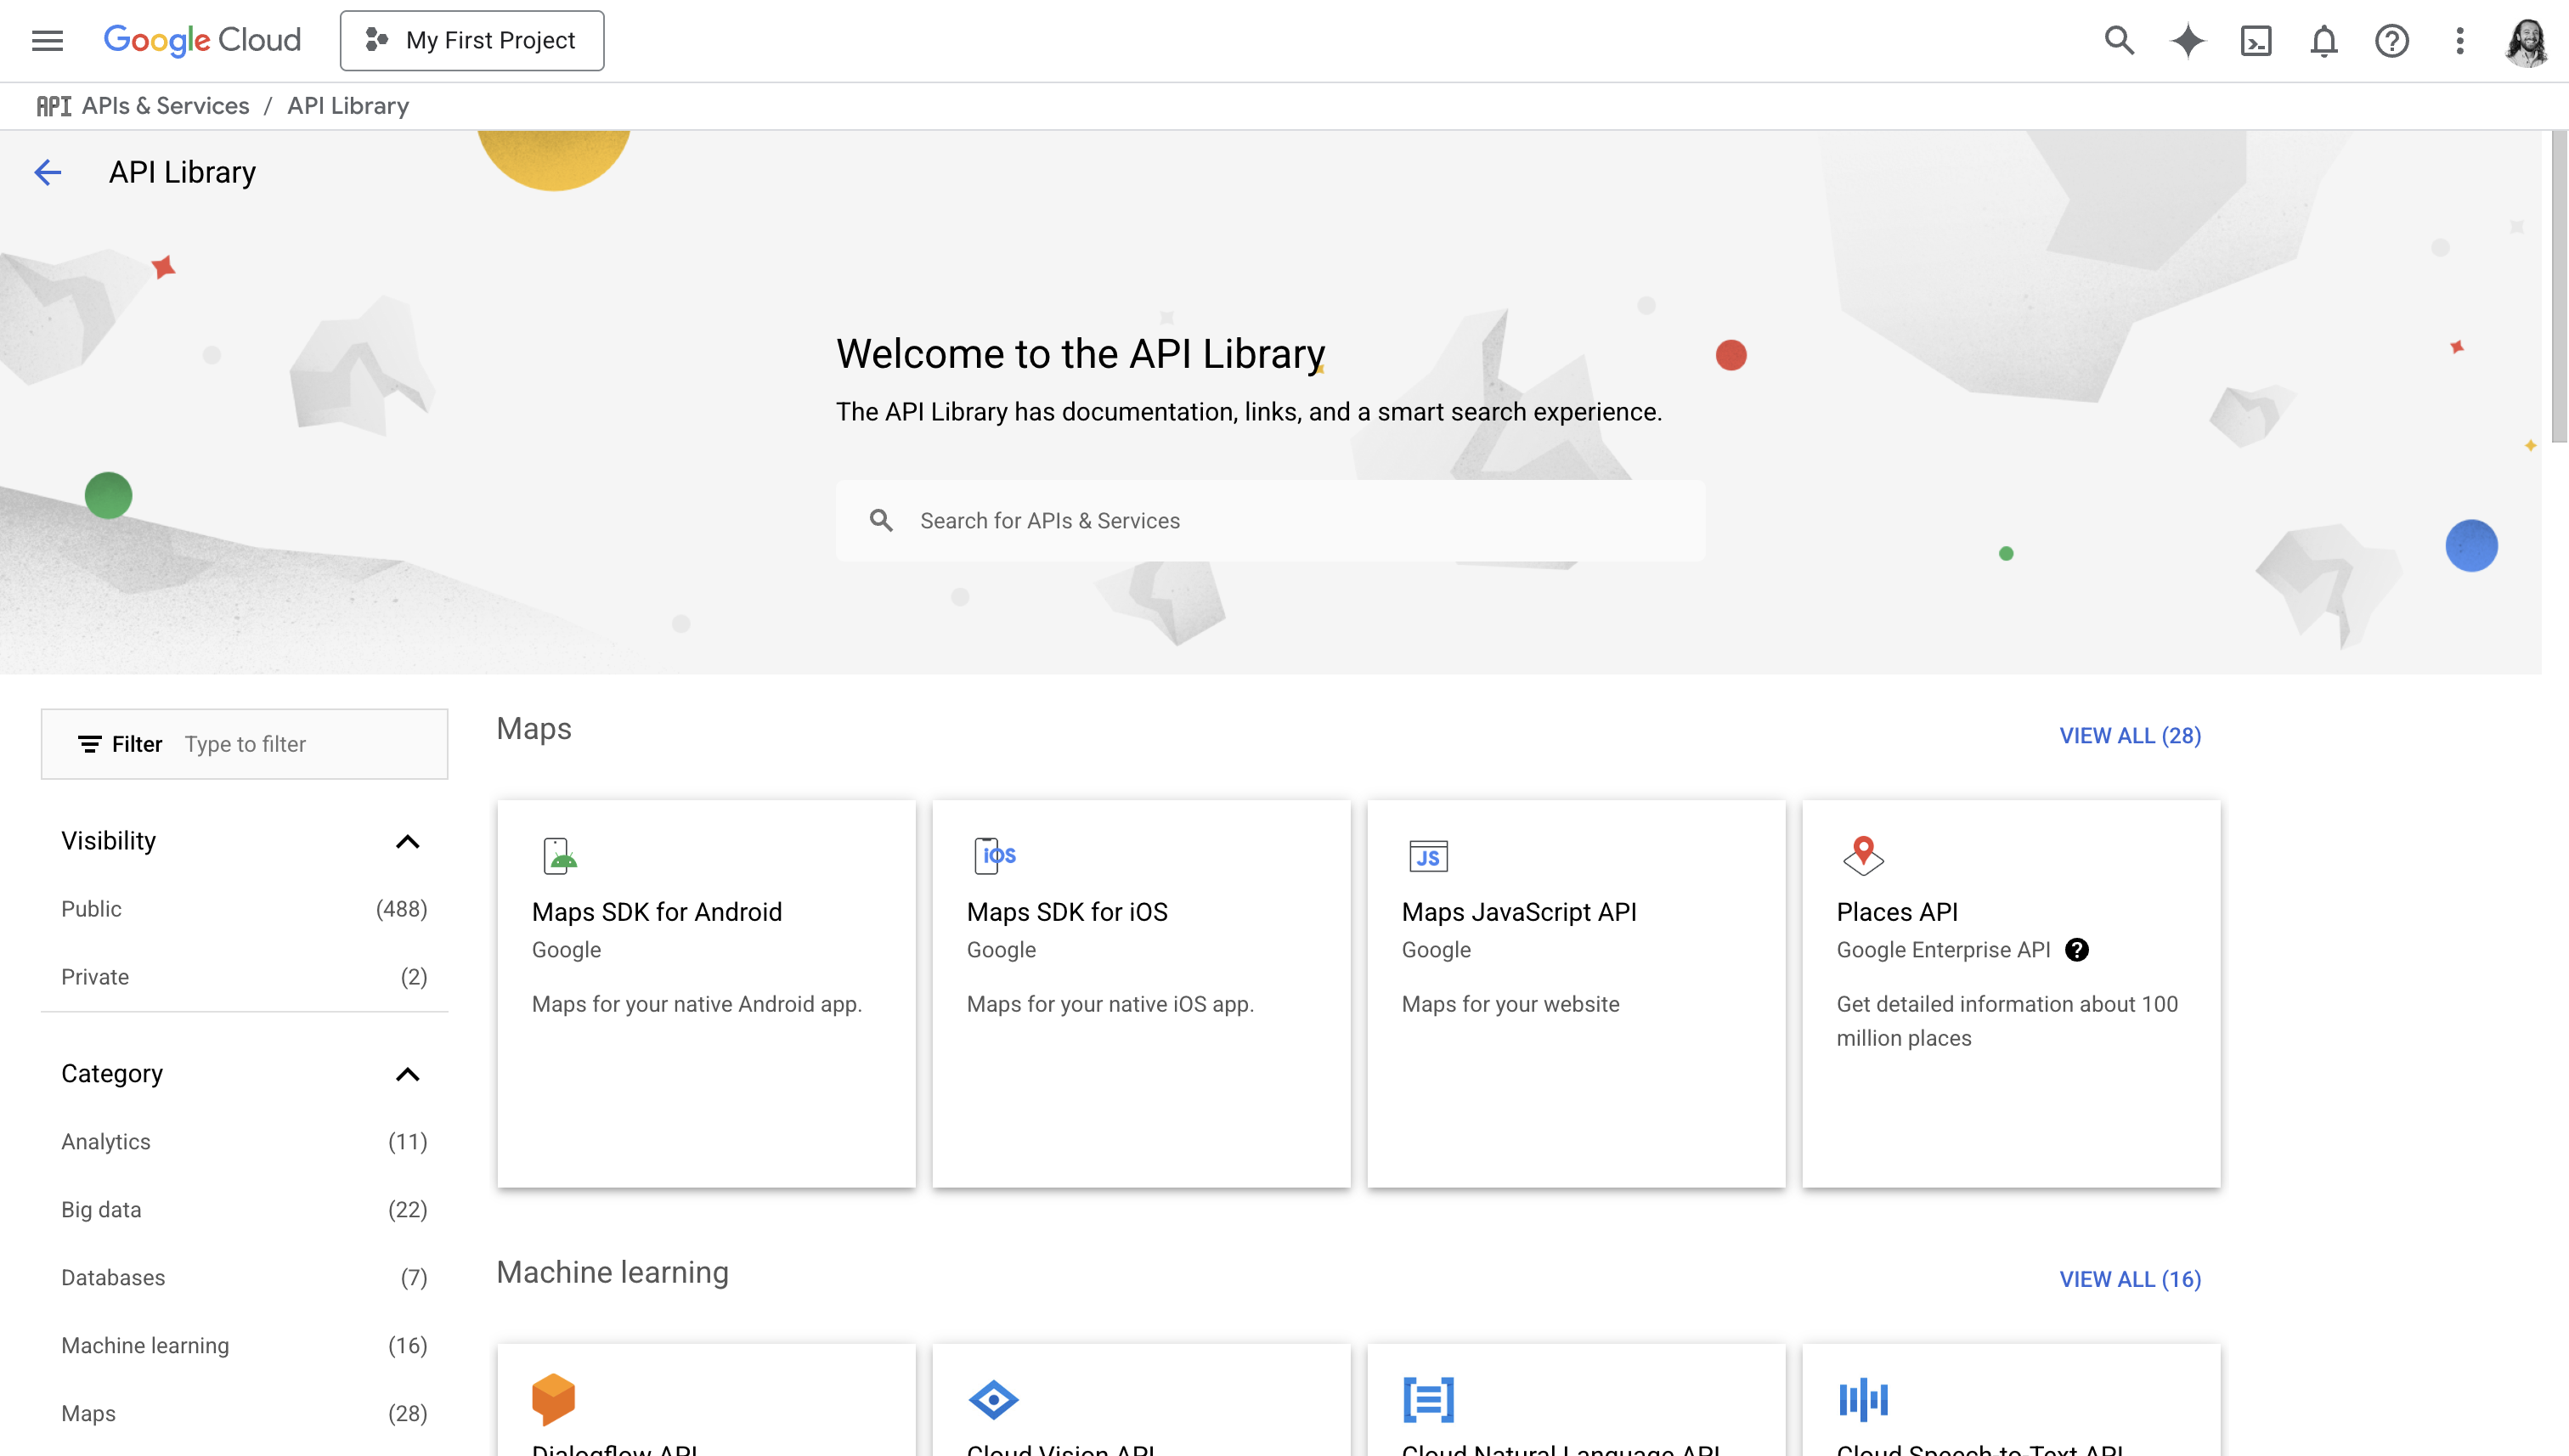
If the API you want to access isn’t listed, it may be that you haven’t enabled that API yet in your Google Cloud project. Google requires you opt into every API you use, and you do that opt-in from the API Library.
After enabling APIs and adding the scopes you want to your Data Access settings, Google will categorize your requested scopes into the sensitivity bucket they fall into.
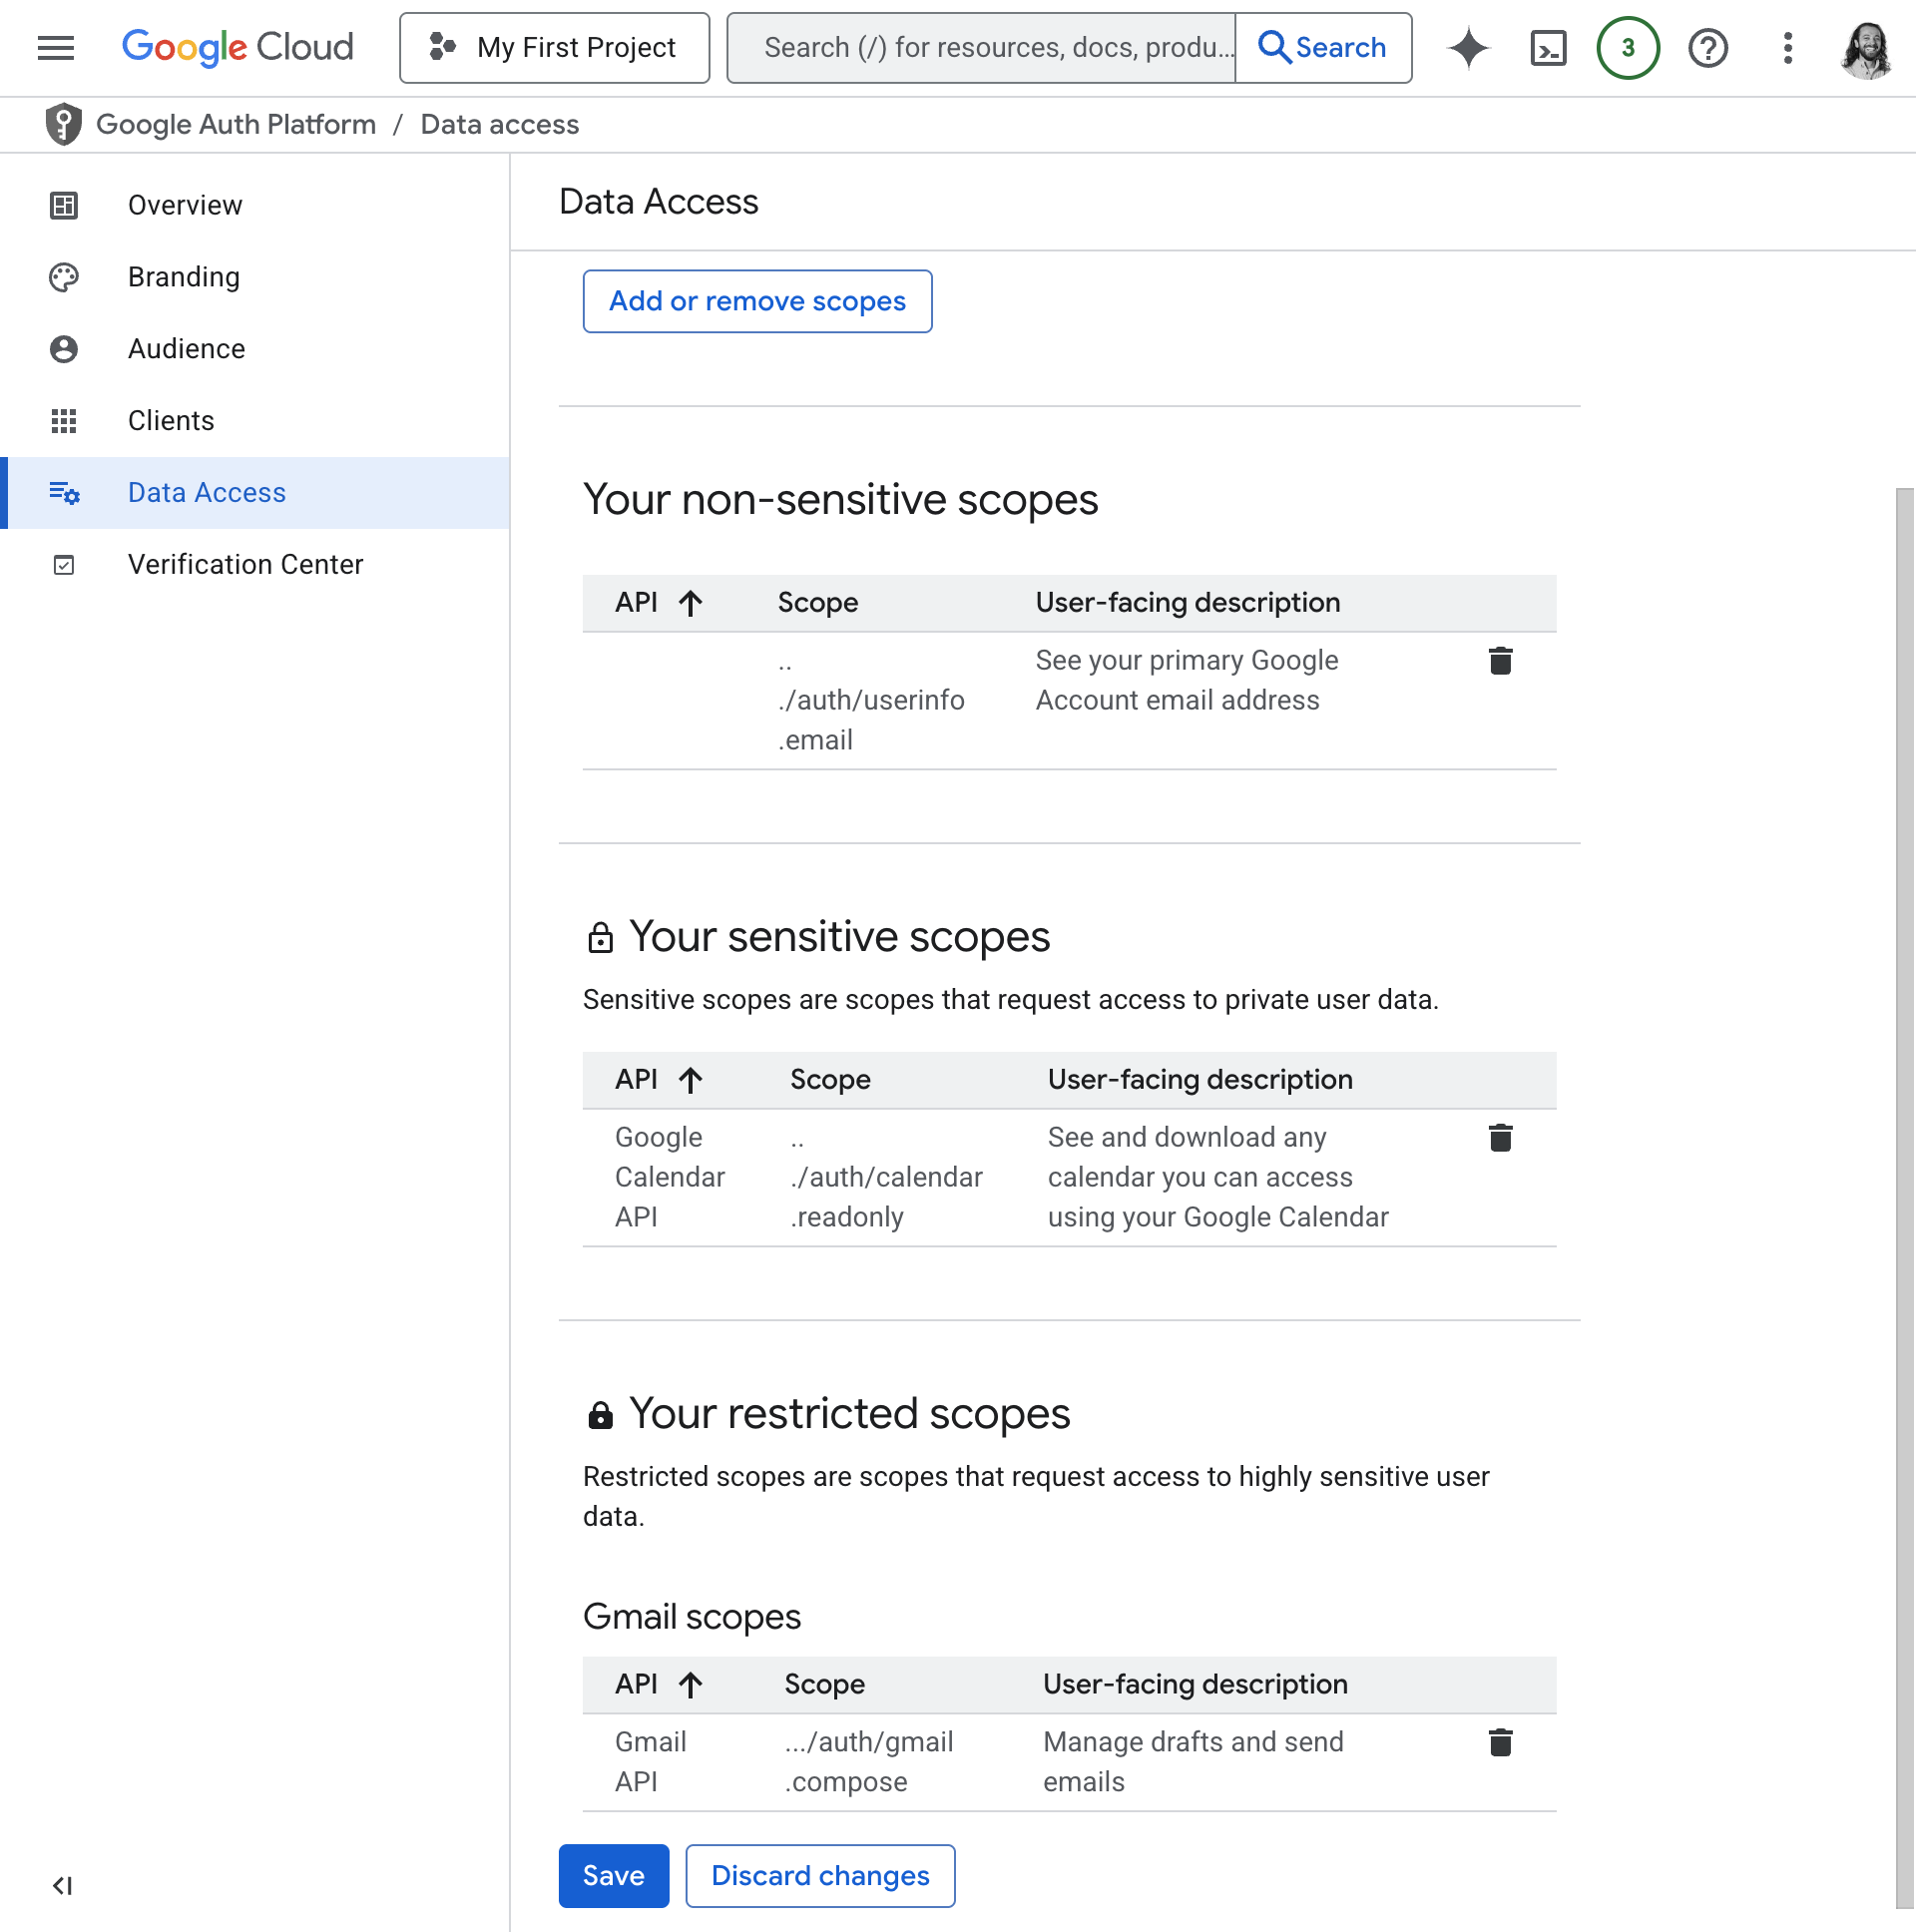
An example set of scopes. calendar.readonly is sensitive, and gmail.compose is restricted.
Exceptions to Scope Verification
If you intend to use sensitive or restricted scopes with the general public, you won’t be able to circumvent verification. Google makes exceptions for three kinds of use-cases, which are spiritually for “pre-production” and “internal to my company” use-cases:
-
If your app’s “Publishing status” is Testing, then you don’t need scope verification. You can configure your app’s publishing status under the Audience section of Google Auth Platform.
If you have multiple OAuth Clients in your Google project, publishing status affects all of them.
There are serious restrictions on “Testing” apps. In particular, you need to whitelist each user that can use your app. You can only whitelist up to 100 users.
-
If your app’s “User type” is Internal, then you don’t need scope verification.
If your Google account belongs to a Google Workspace, then your “Internal” apps can only be used by other members of your Google Workspace — in other words, your coworkers.
Sensitive Scope Verification Process
If you use a scope marked as “Sensitive”, Google will require Sensitive Scope Verification before letting you go to production.
This process usually takes a week if you’ve done everything right.. Consult Google’s documentation to ensure you’re following best practices. In particular, be sure to:
-
Use correct branding for your Log in with Google button.
-
Use incremental authorization to avoid asking for sensitive scopes without first explaining why you need them.
You’ll need to upload a YouTube video demonstrating your app’s login flow and subsequent incremental authorization request. That video will play a large part in determining whether this process goes smoothly for you.
Sensitive scope verification is not an automated process. When you submit a request, you become a support case inside of Google’s systems. A human that works for Google will review your case. Be kind to this human.
Ultimately, Google’s goal with sensitive scope verification is to make sure you aren’t distributing malware. Google is trying to protect their users.
Restricted Scope Verification Process
If you use a scope marked as “Restricted”, Google will require Restricted Scope Verification before letting you go to Production.
This process usually takes at least a month if you’ve done everything right. You’ll have to follow all the steps of the Sensitive Scope Verification Process, plus a security assessment. You’ll need to pass this security assessment once, and then repeat the process every 12 months indefinitely.
Take the security assessment seriously. Pay very close attention to every detail. At a high level, the process will go like this:
-
After submitting your request to Google for Restricted Scope Verification, you’ll receive correspondence from Google.
-
In that correspondence, Google will assign you to fulfill a “CASA Assessment”. CASA is a standardized set of security checklists that Google has outside contractors verify against your application.
The CASA website is confusing, because it’s part of the “App Defense Alliance”, which does a bunch of unrelated things. You can ignore “Malware Mitigation”, “MASA”, or other programs under the App Defense Alliance. Only CASA applies to you.
Whenever the CASA documentation says “the application”, that means your product. Whenever the CASA documentation says “framework user”, that means “Google”.
-
Google will tell you what CASA Assurance Tier you need to fulfill.
-
Google has a bunch of Authorized Assessors that are allowed to certify that you pass the CASA security checklist. You will pay one of these Authorized Assessors to validate that you pass CASA requirements.
-
Exactly what happens next depends on which Authorized Assessor you choose. Generally speaking, the process starts with the Assessor doing a set of automated and non-automated tests against your application.
If your Assessor finds issues, you’ll need to fix them and then repeat the scanning process. It can take up to a week to go through this cycle.
-
Your Assessor will also ask you to complete a questionnaire. It will usually have dozens of questions, many of which will seem like trivial variations of one another.
Answer these questions carefully. Each question is a checkbox your Assessor needs to verify you comply with. Whenever possible, make your compliance easy for your Assessor to check off.
The Restricted Scope Verification process is a process you need to approach with care. If you stay on top of this process, you can expect it to take approximately a month. The process can drag on for much longer if you aren’t proactive about quickly and carefully doing what the process requires of you.
Limitations to Log in with Google
This section documents some issues you’re going to encounter with “Log in with Google” in the wild. This section is meant to illustrate challenges you should anticipate, and which you can’t avoid because of how Google’s auth mechanisms work.
User and Tenant ID Stability
See the Google User Data Model section of this
article for more, but you should be aware that email and hd (“hosted
domain”, i.e. a company identifier) can change over time for the same user /
company. Google has an alternative to email that is fixed over time, but Google
does not have such an alternative for identifying companies.
Enterprises need you to disable Log in with Google
Log in with Google is a popular login method for many individuals and small businesses. Large businesses, however, often do not like Log in with Google.
It is not easy for a large business to restrict which of their employees can use Log in with Google to log into your product. Google does have some tools that Google Workspace operators can use, but they are difficult to use.
Instead, large businesses will ask that you support turning off Log in with Google for their company within your product. You should be prepared to do this. Instead, your customer will likely want their logins happen exclusively through SAML.
The simplest option for disabling Log in with Google on a per-company basis is to have a “blacklist” of domains; if someone tries to Log in with Google from that list of domains, then you deny the login. This approach works less well if the company doesn’t have a simple set of email domains they use; contractors or various subsidiaries, for instance, may make a blacklist over-broad or impractical. But it’s usually a good starting point.
Common Attacks
This section details common vulnerabilities that folks introduce when implementing Log in with Google.
Session Fixation using Cross-Site Request Forgery (CSRF)
The approach described in Authorization Endpoint in
this article prevents this attack. In particular, the UUIDv4 used as a state
parameter prevents all CSRF, including session fixation
over CSRF.
“Session fixation” means “an attacker can trick victims into logging into an account the attacker created”.
It might not be obvious why this is an issue. Usually we’re worried about attackers logging into victim’s accounts, not victims logging into attacker’s accounts. Here’s an explanation of the attack:
-
An attacker is trying to steal company secrets from a victim employee.
-
The attacker signs up for your product, and creates a user profile that looks a lot like the victim’s. They use the same name, profile picture, etc. When you’re logged into this attacker-created account, you’d have to pay a lot of attention to notice it’s a fake duplicate of the original account.
-
The attacker does the Log in with Google flow, but they block their web browser from actually redirecting to your Redirection Endpoint. They now have a URL containing an OAuth
codethat, if redeemed, gives you user details about the attacker’s fake account. -
The attacker tricks your victim user into visiting that link. The attacker has 10 minutes between creating the link and getting the victim to click on it, because Google OAuth
codevalues expire after 10 minutes. -
The victim visits the link. If you didn’t implement CSRF protection using the
stateparameter, then your webpage sends thecodeto the backend, and logs the victim into the attacker-created account. -
The victim thinks they’re logged in as usual, and inputs sensitive company details into your product. Your attacker has the ability to see this sensitive company data, because they can log in this account too.
In other words, session fixation is a way for attacker to execute very convincing phishing attacks.
The link the victim visits is a form of “request forgery”. It’s “forged” in the sense that the “authentic” redirect was meant to be used by the attacker, not the victim.
The way to prevent this attack is to have your web application validate that it
was the one to redirect to Google in the first place. That’s what the
google_csrf_token in the state parameter section
above does. Before redirecting to Google, you save a random value and give it
out to nobody except the user. Before accepting a code from Google, you make
sure Google echoes back the same random value back to you. Attackers can’t guess
that random value, and so they can’t trick your web application into accepting
“forged” requests.